These instructions apply to Autodesk® Infraworks 2024 and potentially earlier, and describe how to load georeferenced MetroMap imagery using either the Web Map Service (WMS) or downloaded imagery from MetroMap.
Screen images shown below in these instructions are from InfraWorks 2024.
Loading Georeferenced Images
If you have used the Clip It or Download tool from the MetroMap website and you want to apply this image in your InfraWorks project, the following steps will help you through.
Note: Please be sure to download the image with the georeferenced option selected when using the Download tool.
Step 1 - Locate Your Files
- Locate your downloaded zip folder.
- Your delivered zip folder should contain a MetroMap image and metadata files with the same filename. The file formats depend on your choice of tool or format when using the Clip It tool (PNG, JPG, GeoTIFF).
- Unzip the folder.

Please note that our MetroMap system provides various projection systems.
For more introduction about these projection systems, please refer to Clip It!.
Step 2 - Import the File to InfraWorks 2024
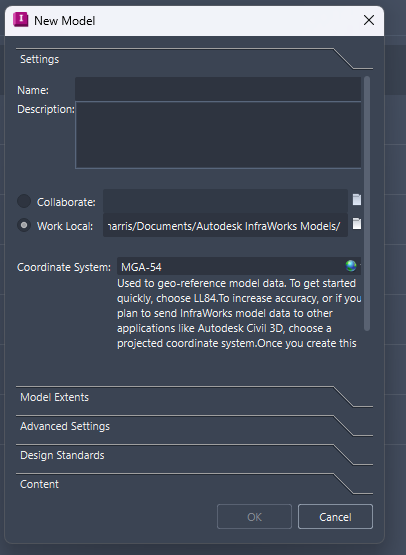
- Start InfraWorks 2024, either creating a new project or opening a saved project. It is recommended to have the projection/coordinate system of your image match the project. Once a coordinate system is applied to a project in InfraWorks, it cannot be changed.
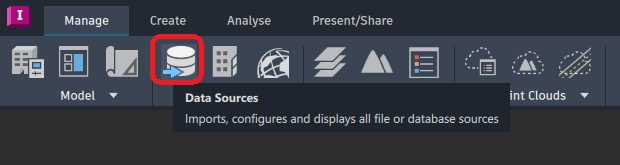
- With a project now open, open the Data Sources panel by selecting it in the Content section of the Manage tab.
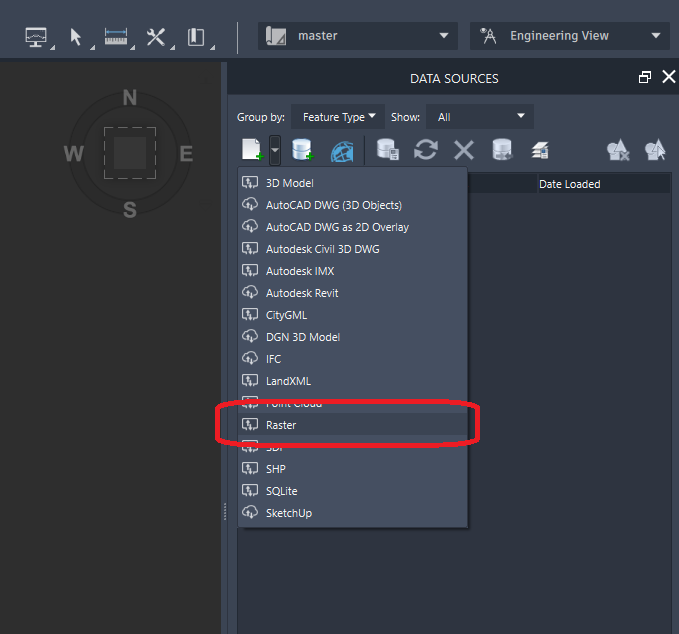
- Now that the Data Sources panel is open, request to import a raster connection by selecting the drop-down arrow next to Add file data source and choose Raster.
-
Find your image file and select it. After this, the image file should become listed as a data source.
-
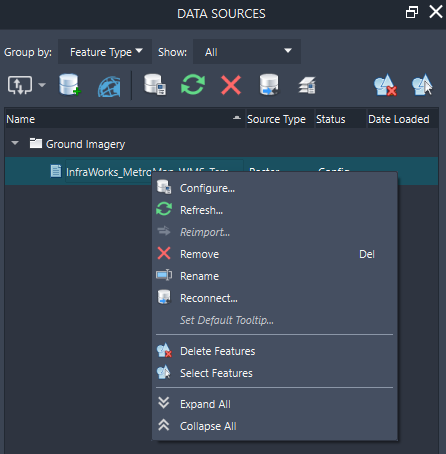
Now that the connection is created, the file needs to be configured and imported. To do this, right-click on the filename in the Data Sources list and open Configure.
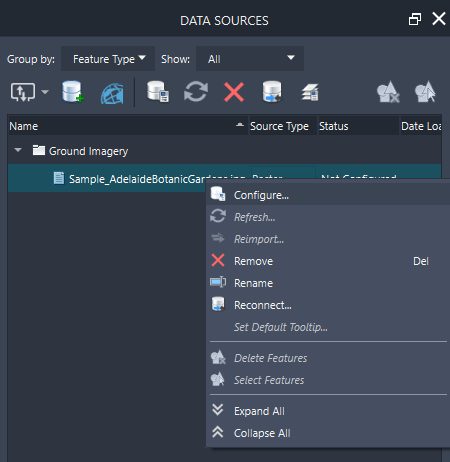
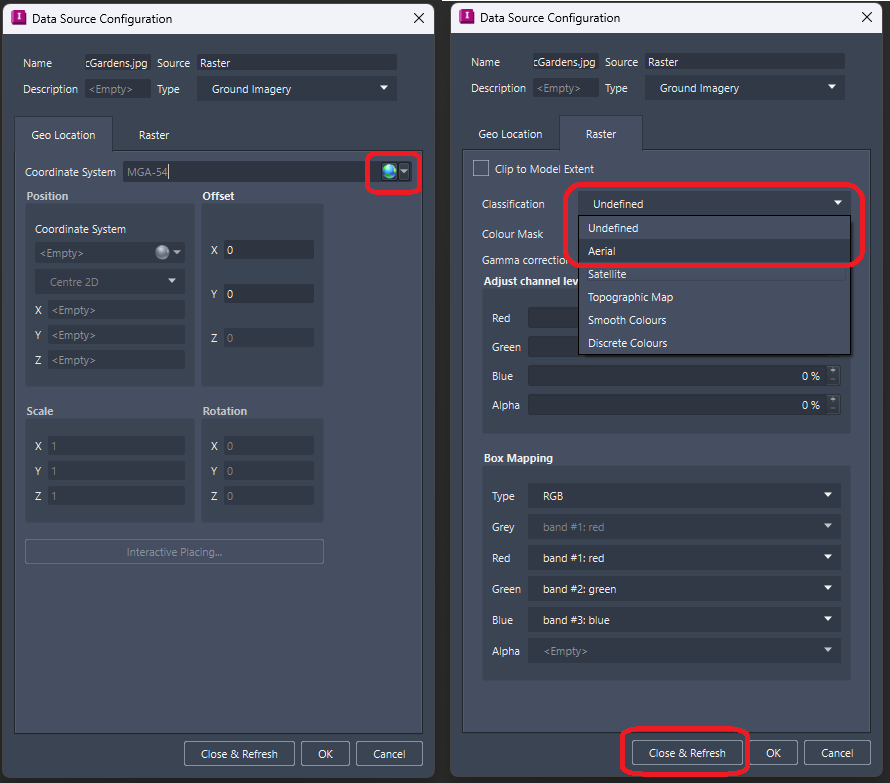
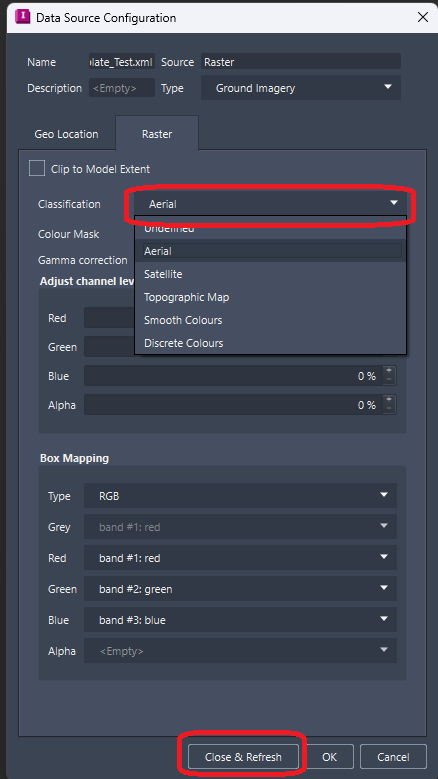
- In the configuration menu, first apply the coordinate system of the image under Geo Location. The coordinate system to use is the system chosen when downloading the image with the Clip It tool or Web Mercator for the Download tool (WGS84.PseudoMercator in InfraWorks). Once the coordinate system is chosen, open the Raster tab and change the classification, in this instance Aerial was used. Once ready, choose Close & Refresh to start the importing process.
If you have a large image file and want to limit the import to the area of your established project, tick Clip to Model Extent
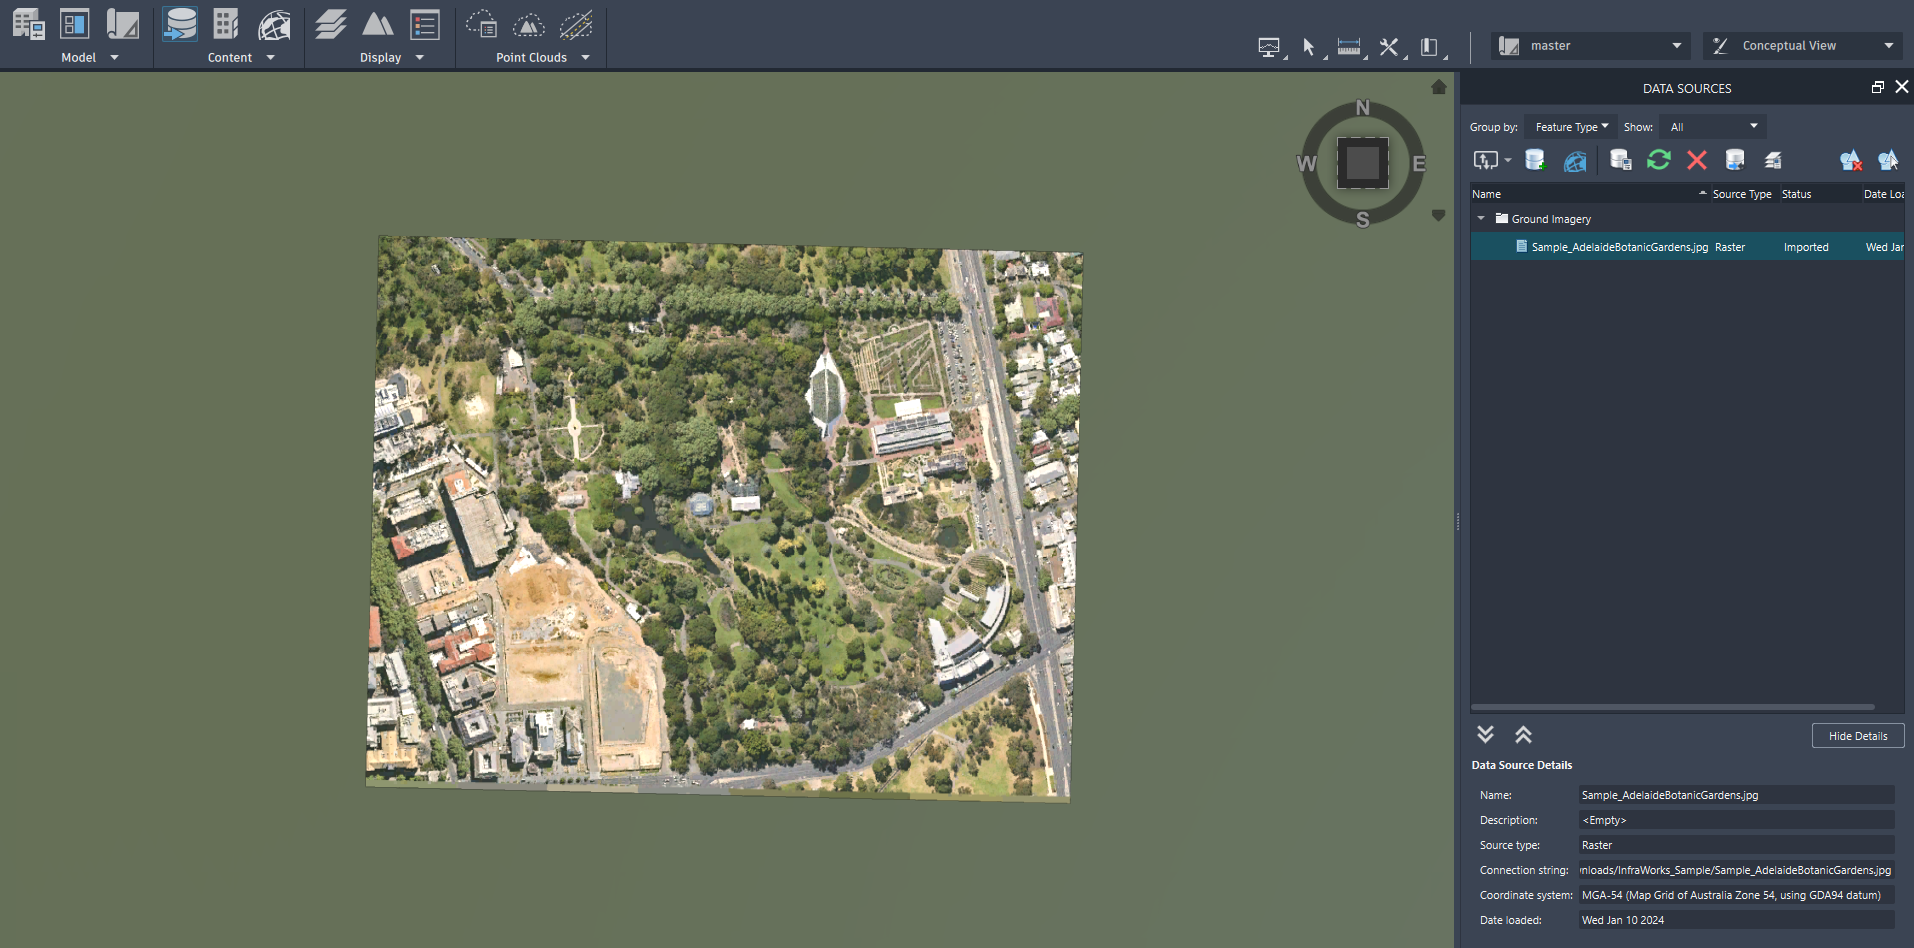
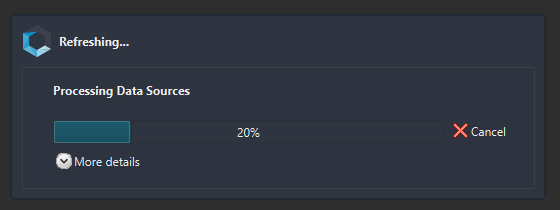
- InfraWorks will now import the image file, the time taken for this is dependent on the size of the image.

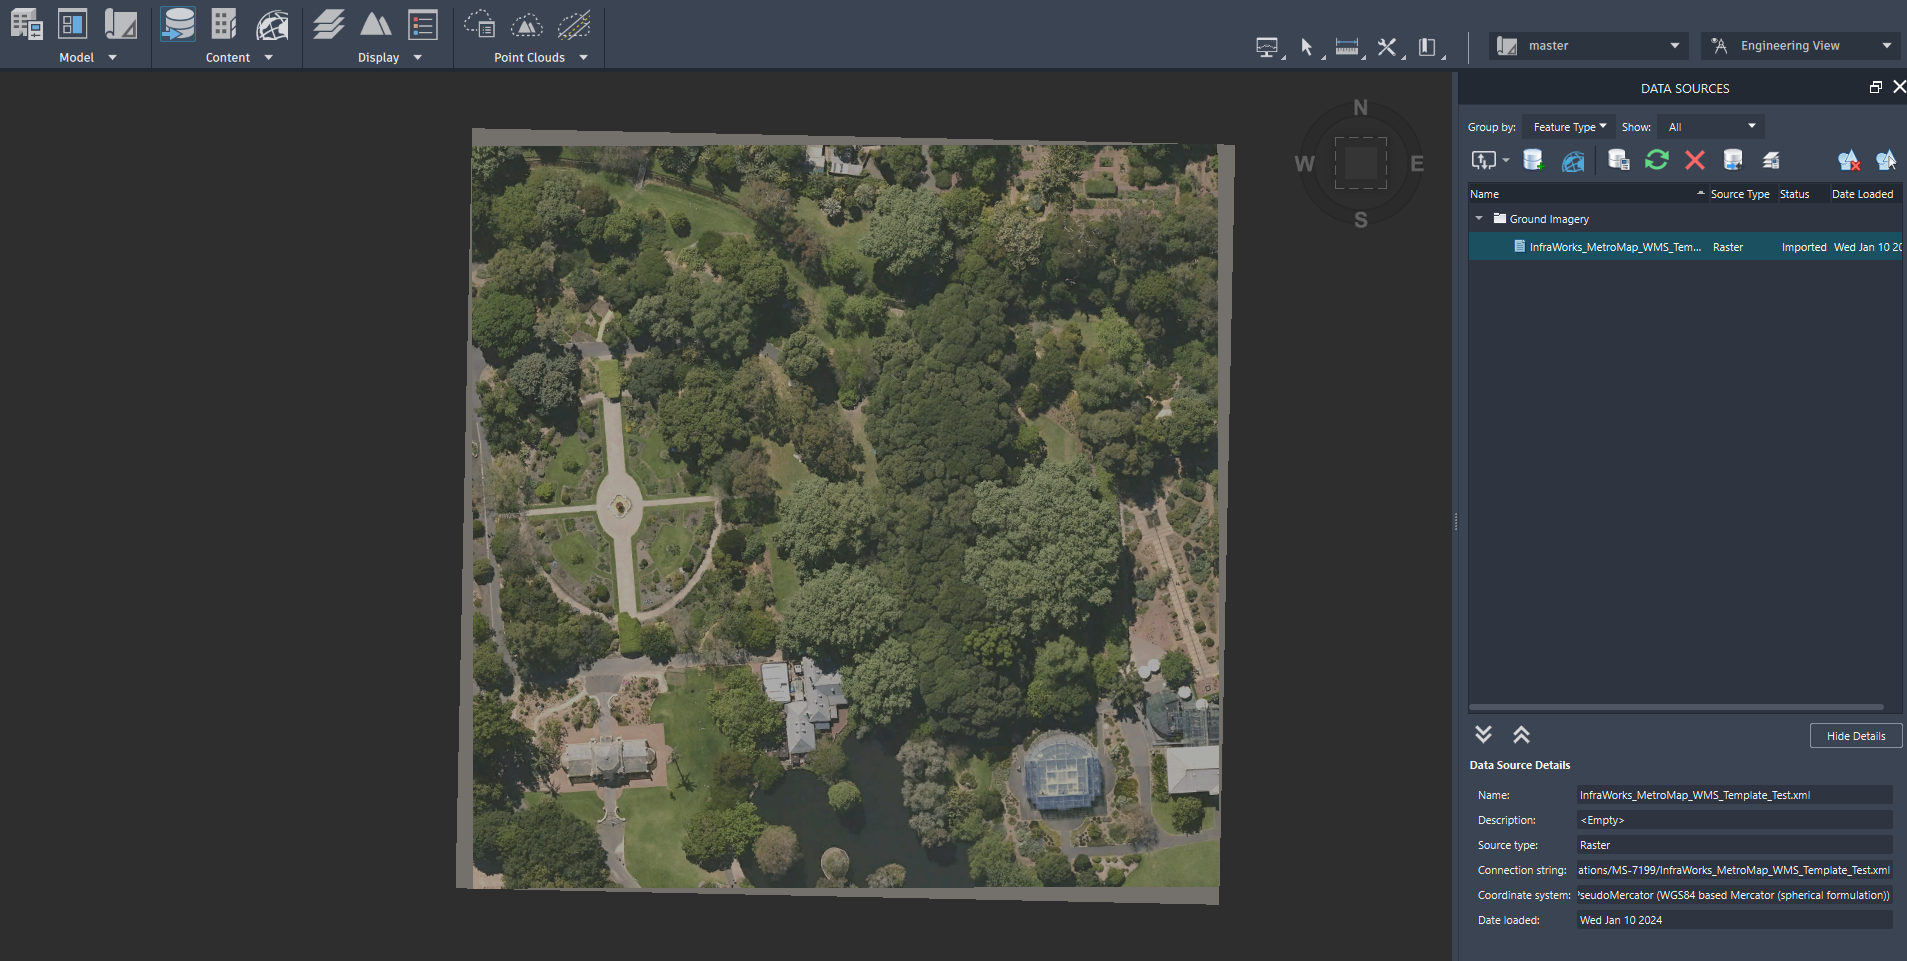
- The image should now be imported and applied to the project.
Setting up a WMS Service
In addition to raster image importing, InfraWorks supports 'GetMap' WMS image requests. Due to the limitations involved and the more complex methodology of setting up a WMS connection here, using the Clip It tool and following the above Georeferenced Image guide is recommended.
Successful coordinate systems for WMS import are GDA94 Datum MGA Zone projections (EPSG:28349 - EPSG:28356), and Web Mercator (EPSG:3857). If you are working with a different projection, please follow the above Georeferenced Image guide for that method of image importing.
Before you start
Unlike other applications which we have guides for (QGIS, ArcGIS Pro etc.), the WMS requests that InfraWorks is compatible with is not 'GetCapabilities', but instead 'GetMap' requests. While GetCapabilities requests provide the user with the list of available layers in the WMS service and the subsequent selection of a whole imagery layer, GetMap requests include a bounding box and layer selection as parameters as they are requests for an image of an individual area. Below is an example URL of a GetMap request.
https://api.metromap.com.au/ogc/key/API-KEY/service?SERVICE=WMS&VERSION=1.3.0&REQUEST=GetMap&BBOX=15985673.39343661442,-4512128.675878273323,15990980.91066532023,-4508049.848888013512&CRS=EPSG:3857&WIDTH=2000&HEIGHT=1537&LAYERS=Australia_latest&STYLES=&FORMAT=image/png&&TRANSPARENT=TRUE
InfraWorks does not have an option for inserting a request URL like above, instead you will need to create an XML file with the request in XML formatting. Below is an example and template of the request text in XML format which can be copied and pasted into a XML text file. You will also need an API key which can be provided to you by MetroMap Support.
<GDAL_WMS>
<Service name="WMS">
<Version>1.3.0</Version>
<ServerUrl>https://api.metromap.com.au/ogc/key/YOUR-API-KEY/service?</ServerUrl>
<CRS>EPSG:3857</CRS>
<ImageFormat>image/png</ImageFormat>
<Layers>Australia_latest</Layers>
<Styles></Styles>
</Service>
<DataWindow>
<UpperLeftY>-4152500</UpperLeftY>
<UpperLeftX>15429840</UpperLeftX>
<LowerRightY>-4152800</LowerRightY>
<LowerRightX>15430140</LowerRightX>
<SizeX>4000</SizeX>
<SizeY>4000</SizeY>
</DataWindow>
<Projection>EPSG:3857</Projection>
<BandsCount>3</BandsCount>
</GDAL_WMS>
Setup Steps
Follow these steps to set up AutoDesk InfraWorks WMS connections:
Step 1 - Setting up your XML File
- Open a new Notepad or Notepad++ document and paste in the above template text.
- Replace the YOUR-API-KEY text with your API key.
- To change the projection/coordinate system you are wanting to retrieve imagery for, edit both the CRS and Projection lines with the EPSG code for your desired projection. The template is set to Web Mercator (EPSG:3857).
- Once your projection system is set, input the top-left and bottom-right coordinates for your desired imagery area.
- Now that the imagery location is set, calculate the required SizeX and SizeY which is the number of pixel columns and rows. The equations for these are below.
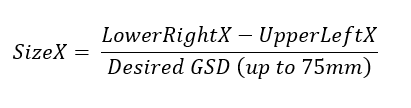
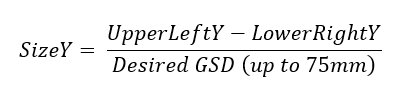
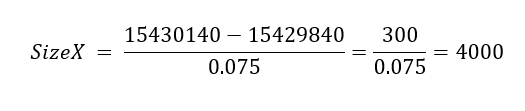
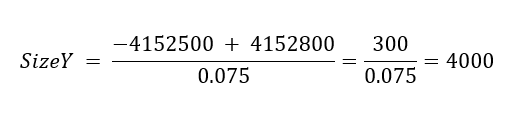
The calculations for the template example are below.
- With all parameters filled out, save the document as an Extensible Markup Language file (.xml).
Step 2 - Import the File to InfraWorks 2024
- Start InfraWorks 2024, either creating a new project or opening a saved project. It is recommended to have the projection/coordinate system in your XML file match the project. Once a coordinate system is applied to a project in InfraWorks, it cannot be changed.
- With a project now open, open the Data Sources panel by selecting it in the Content section of the Manage tab.
- Now that the Data Sources panel is open, request to import a raster connection by selecting the drop-down arrow next to Add file data source and choose Raster.
-
Find your XML file and select it. After this, the XML file should become listed as a data source.
-
Now that the connection is created, the request needs to be configured and initiated. To do this, right-click on the XML file in the Data Sources list and open Configure.
- In the configuration menu, the coordinate system should already be set under Geo Location as it gets read from the XML file. Open the Raster tab and change the classification, in this instance Aerial was used. Once ready, choose Close & Refresh to start the importing process.
If you have a large image request and want to limit the import to the area of your established project, tick Clip to Model Extent
- InfraWorks will now process the request and import the image, the time taken for this is dependent on the size of the image.
- The image should now be imported and applied to the project.
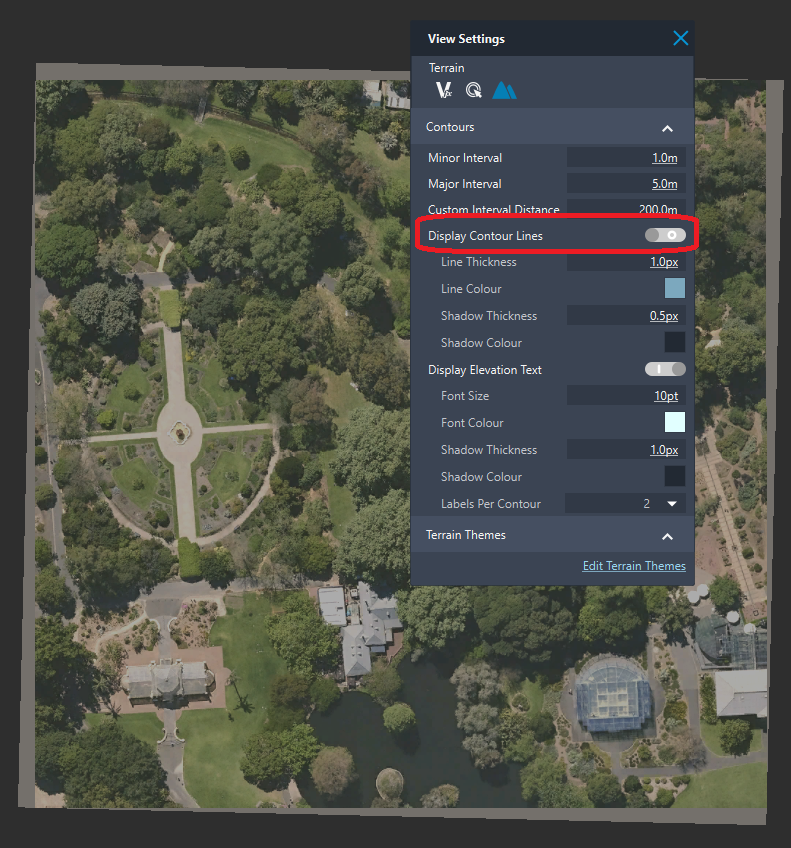
Step 3 - Removing Topographic Overlay
Upon loading the WMS request image into your project, InfraWorks may automatically apply a topographic overlay onto the imagery. MetroMap imagery does not contain elevation data and these contour lines are not a MetroMap product. To remove this, follow the below.
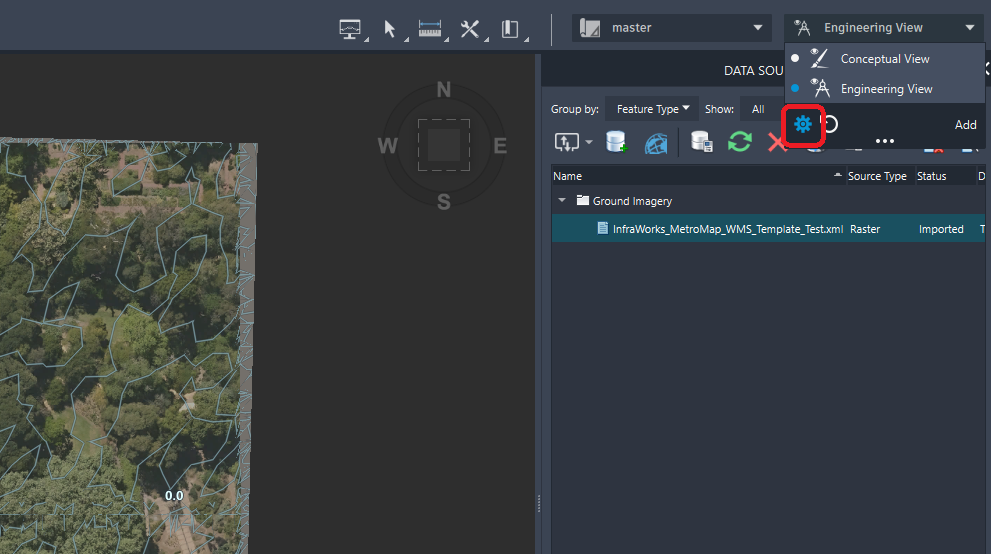
- Click on the project's view setting to open the drop-down menu, then open Configure current view which is the gear icon.
- In View Settings, open the Terrain menu by clicking on the hills icon.
- Click on the Display Contour Lines toggle to toggle off the topographic overlay.