The tutorial page includes the following sections:
Before you start
You will require an API Key to pass authentication and access MetroMap's API Services in Esri software. API Keys are available from MetroMap Support.
You will need to have a MetroMap Enterprise or Partner plan to receive an API Key and access MetroMap APIs
ArcGIS Pro - WMTS/WMS
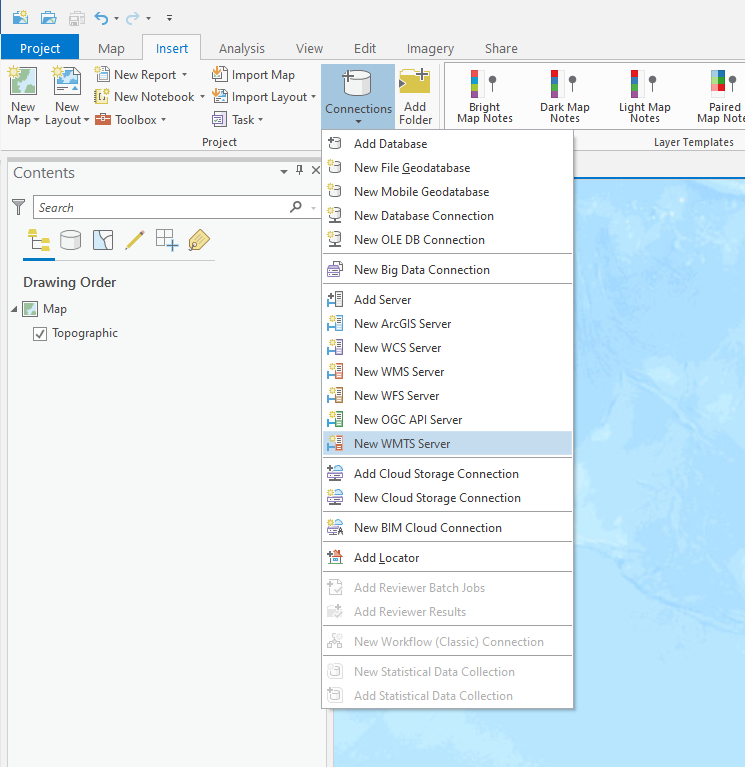
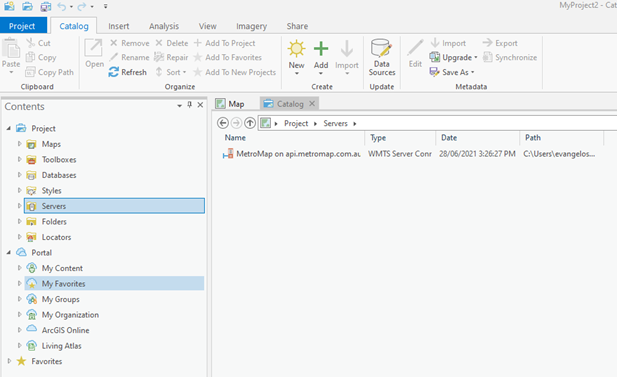
1. Create a new Project in ArcGIS Pro.
Pick either WMTS Server or the WMS Server from the Connections menu. We recommend WMTS.
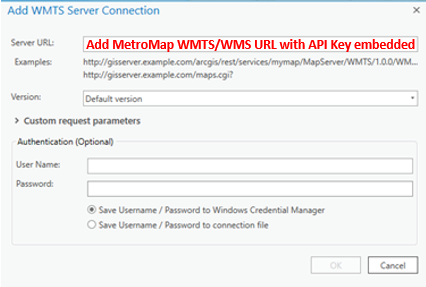
2. Create Your URL
Refer to either WMS or WMTS for the URL you need depending on which service you would like. Use this URL with your MetroMap API key embedded within for the server URL input. 'Server URL' is the only line to fill out, thus you can select 'OK' after entering the complete URL.
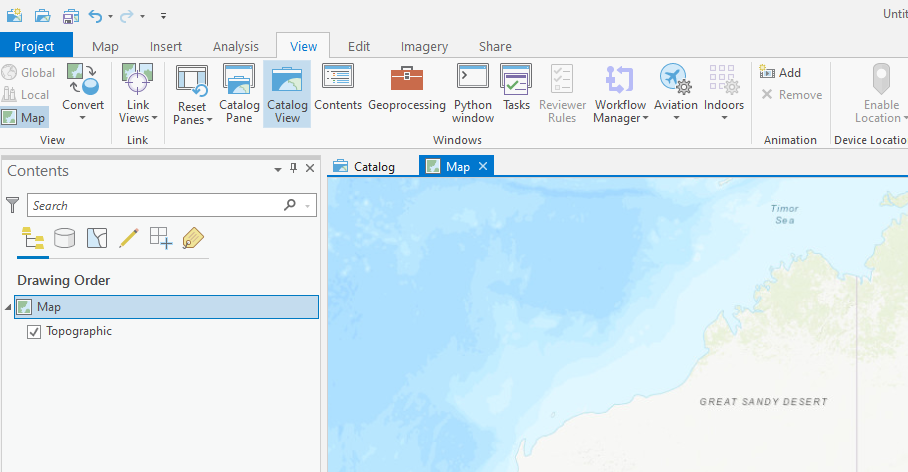
3. Add Catalog View
Click on the view tab and select the catalog View option.
4. Add WMTS/WMS Layers
Click on the server’s folder to access the MetroMap service, then double click twice to access the available layers.
5. Selecting Layer
Right click on desired aerial photography and add to map or scene. Multiple selections are possible by holding shift or control and select.
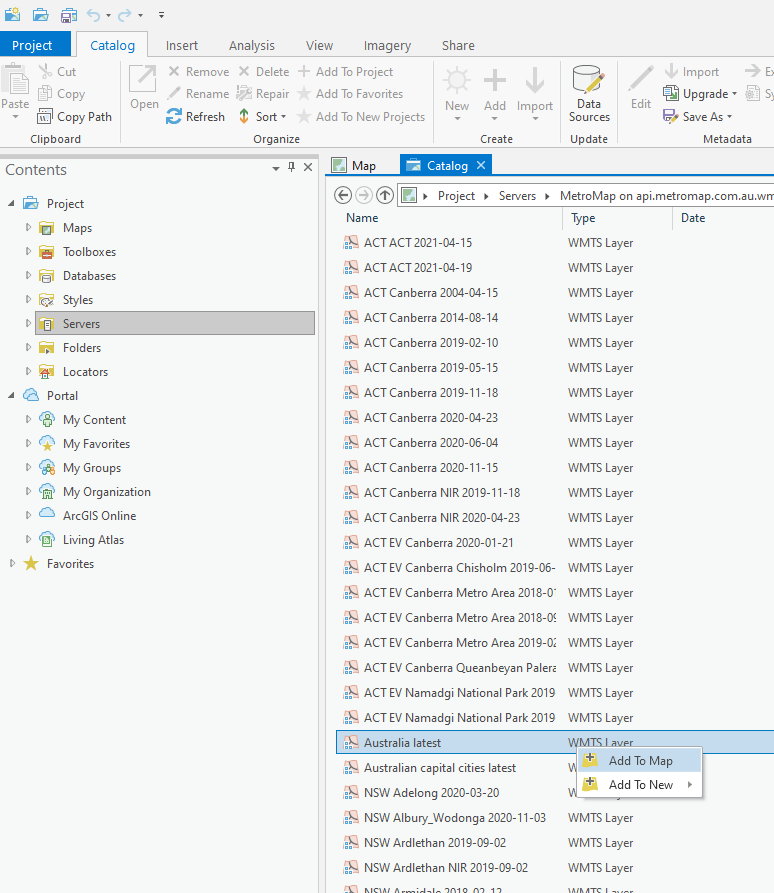
We recommend the 'Australia latest' layer for seamless national coverage;

For more information visit ESRI help page by clicking here.
ArcGIS Online
1. Creating ArcGIS Online Items
This method is for creating an ArcGIS Online item of a WMS or WMTS service layer which can be later included into Esri software maps or applications.
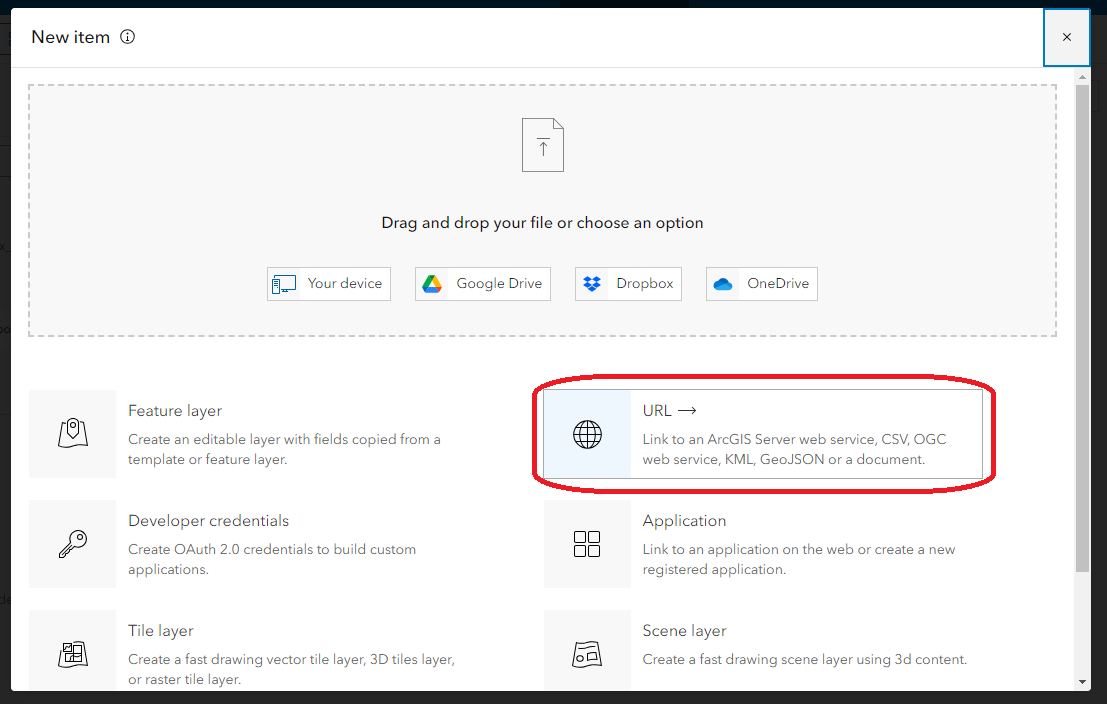
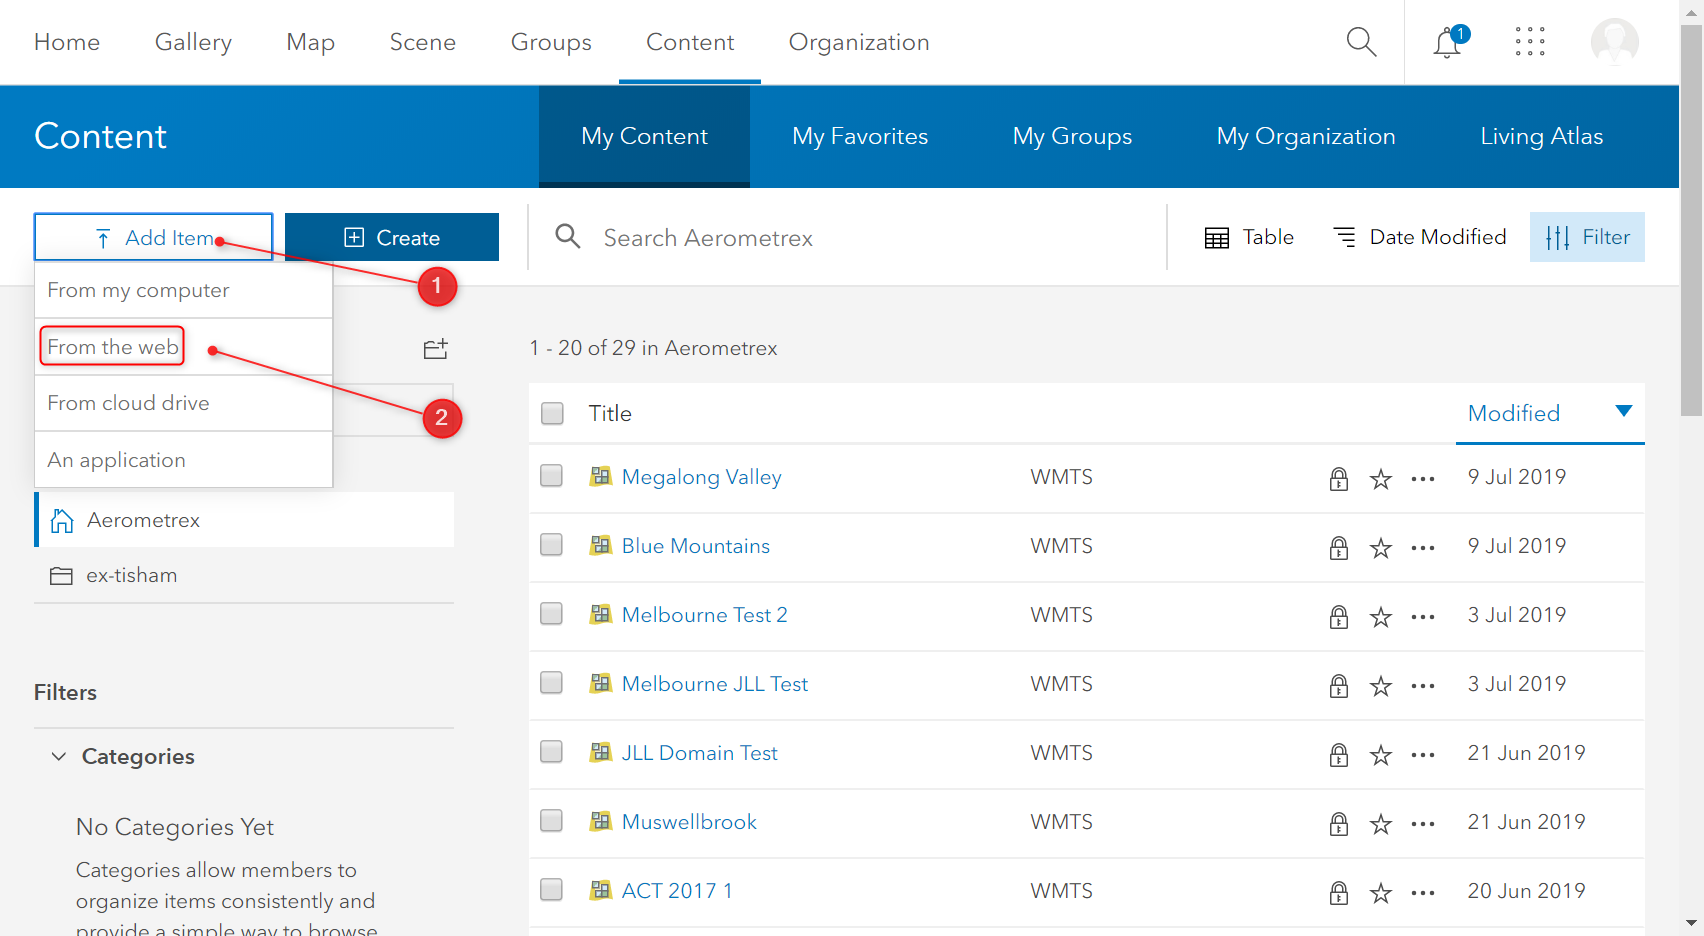
In the Content section of ArcGIS Online, select 'New Item'.

For the source of the new item, choose the "URL" option as a URL will be used to connect to the desired MetroMap service.
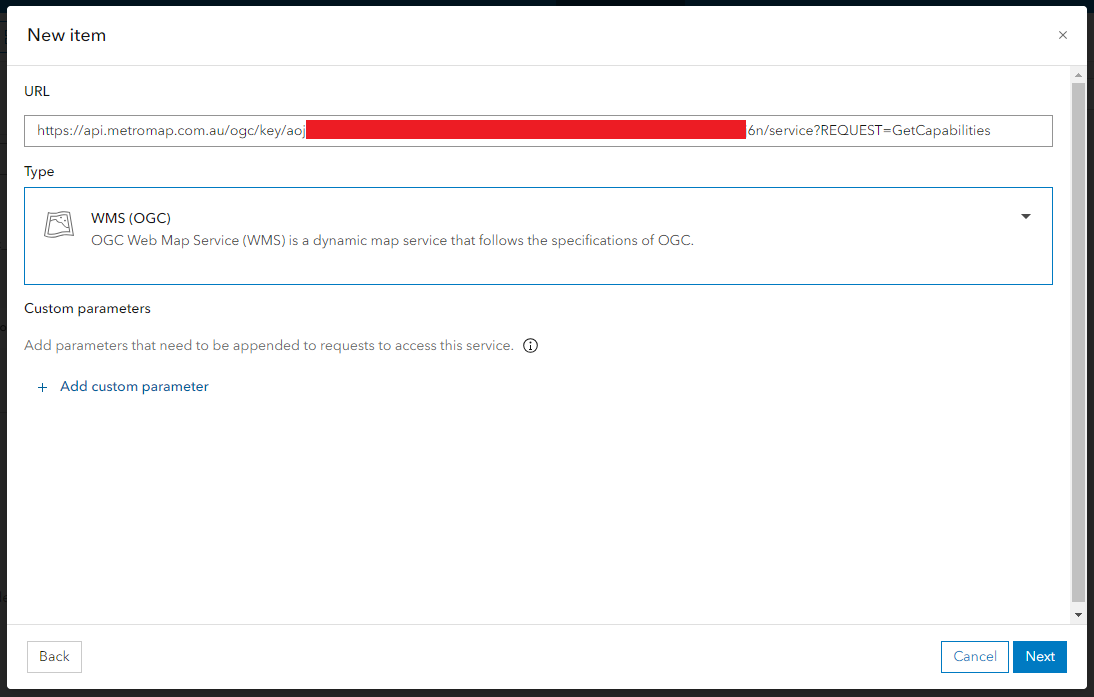
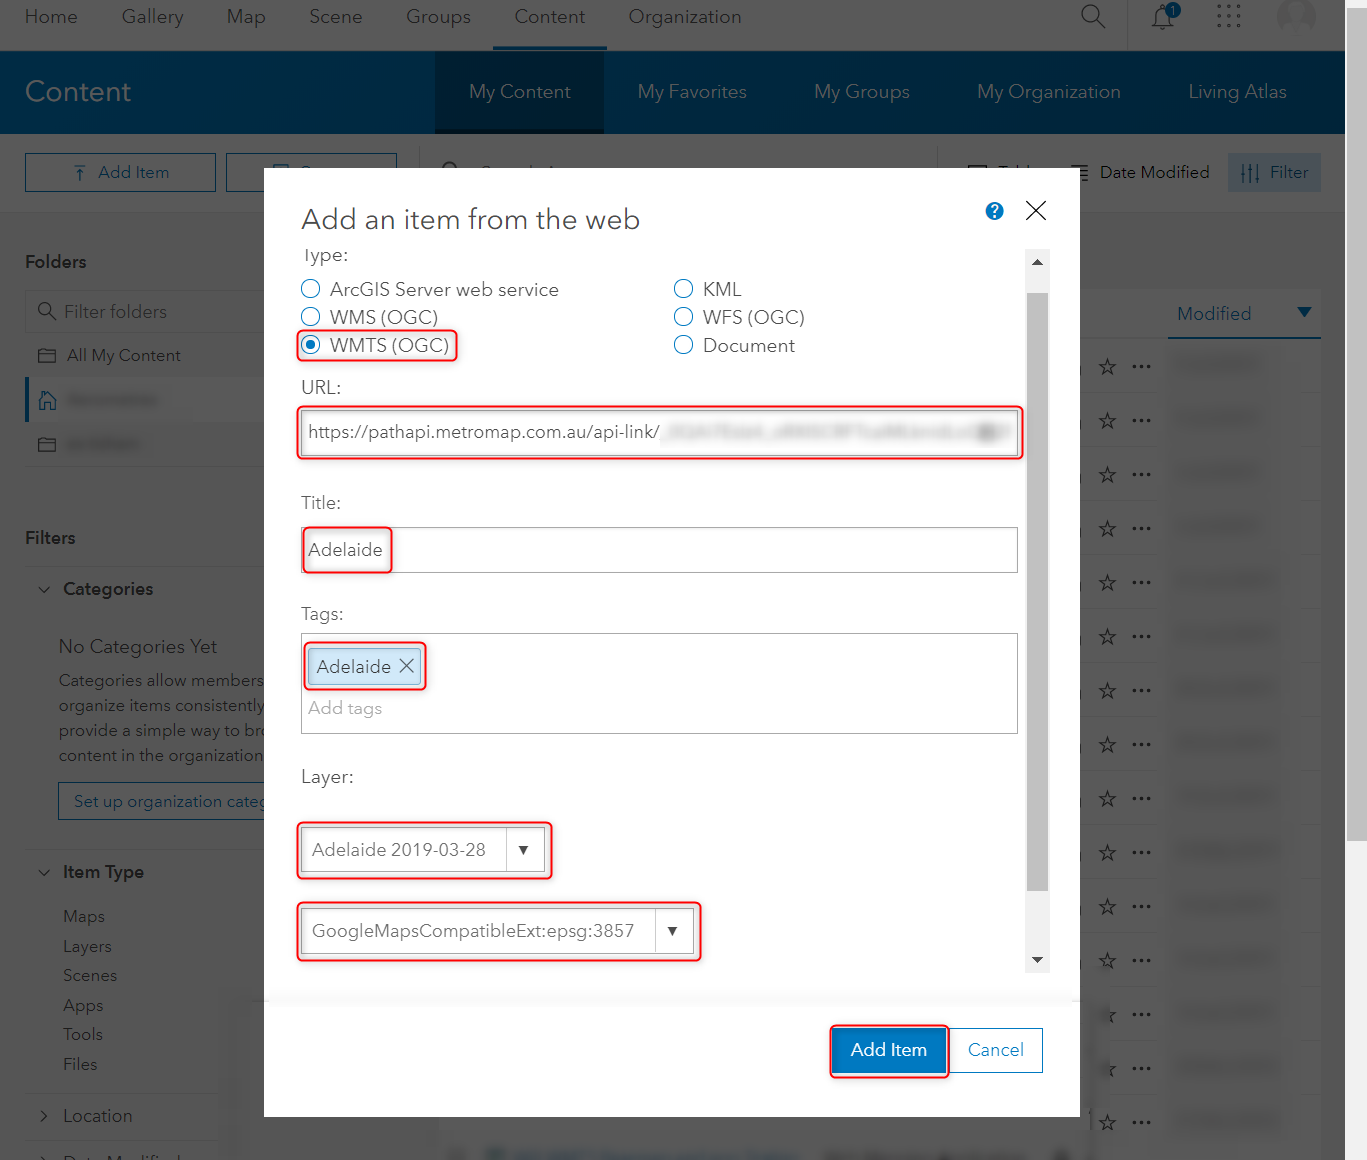
Next is creating the URL for connecting to the service. For this, refer to either WMS or WMTS for the correct URL format depending on which service you would like. Next embed your MetroMap API key within to replace the URL's "{YOUR-API-KEY}" section.
If you do not have an API key and are part of an Enterprise or Partner plan, please contact MetroMap Support for the creation of the API key.
With the URL entered, change the item type to match the service you are wanting to connect to, being either "WMS (OGC)" or "WMTS (OGC)".
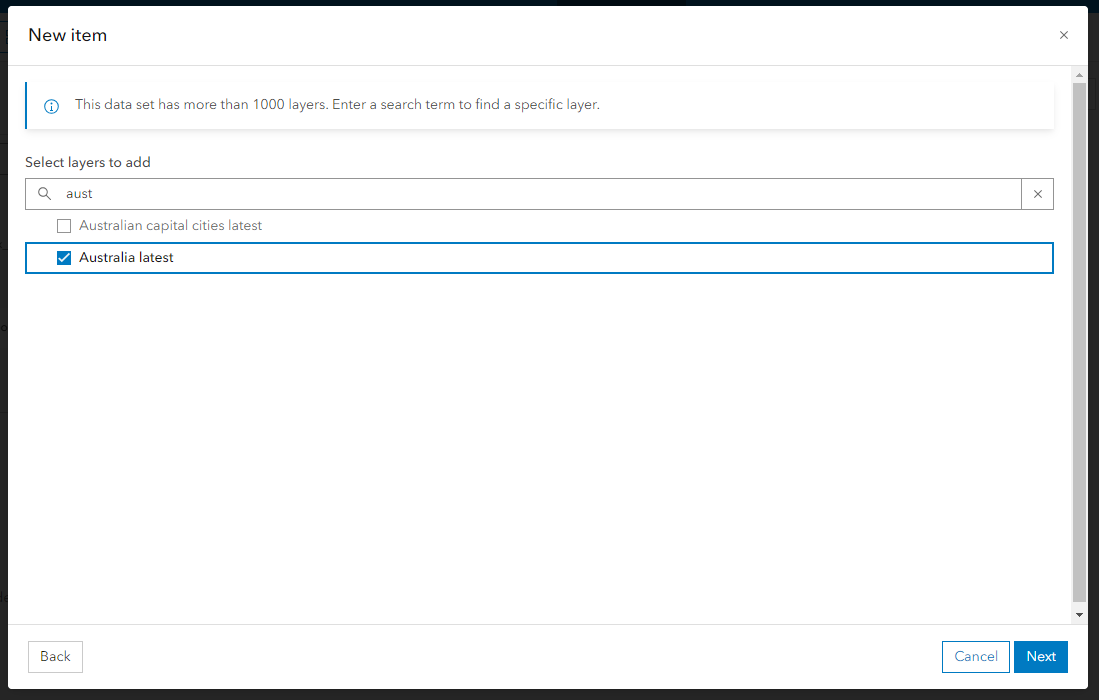
Upon successful connection to the service, you should now have access to the service's layer list. Due to the large number of layers available, it is recommended to use the search function to narrow down your options. For this screenshotted example the "Australia Latest" layer was found and selected.
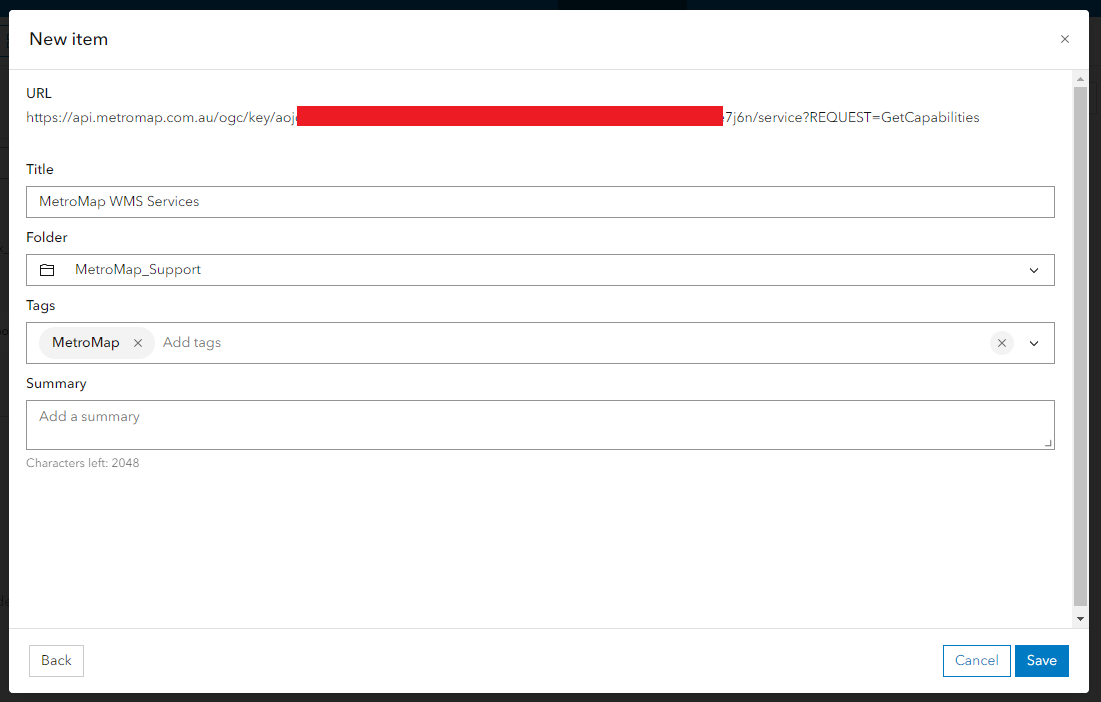
In the last item creation page, you are able to manage the item including choosing its name, saved location, add tags, and add a description if desired. It is recommended to change the title to describe the service and layer if you are likely to create many items utilising MetroMap services.
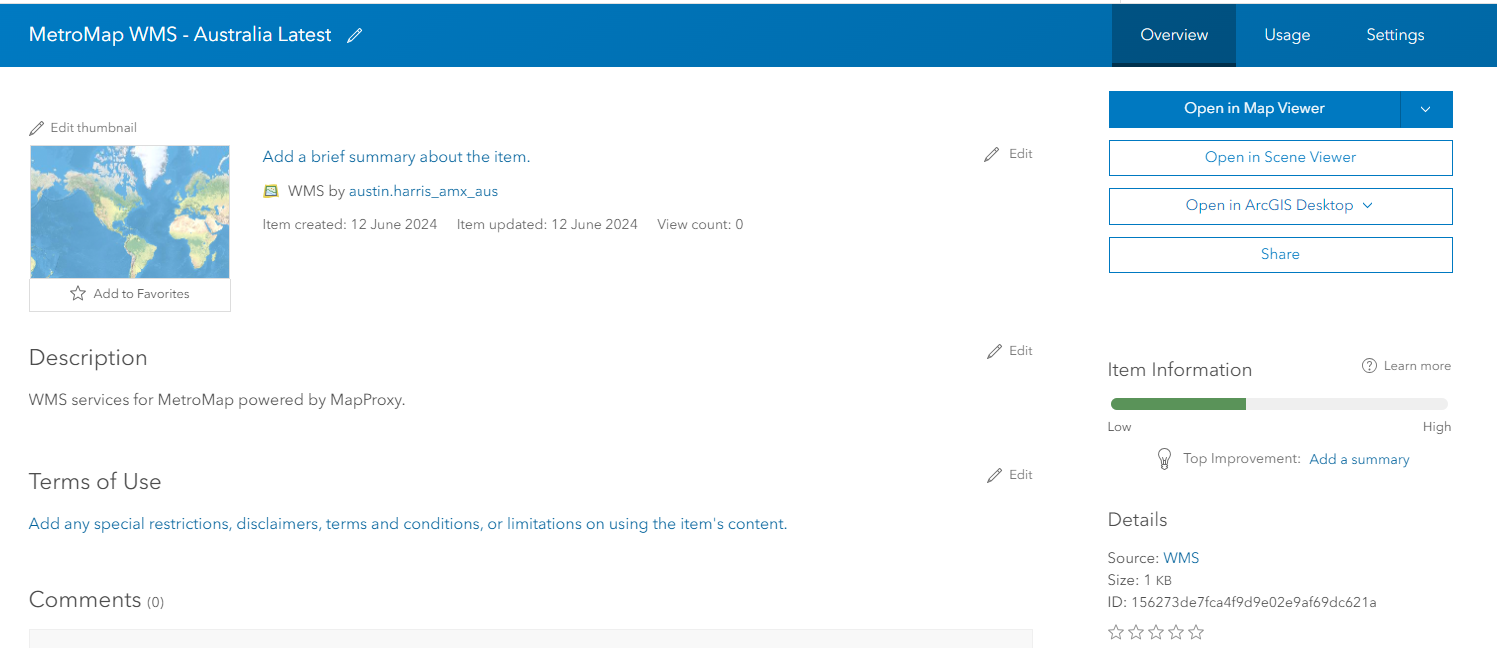
Upon saving the item, you then have the option to be able to add it to a Map Viewer, Scene, or other environments that have access to ArcGIS Online items.
2. Map Viewer Setup
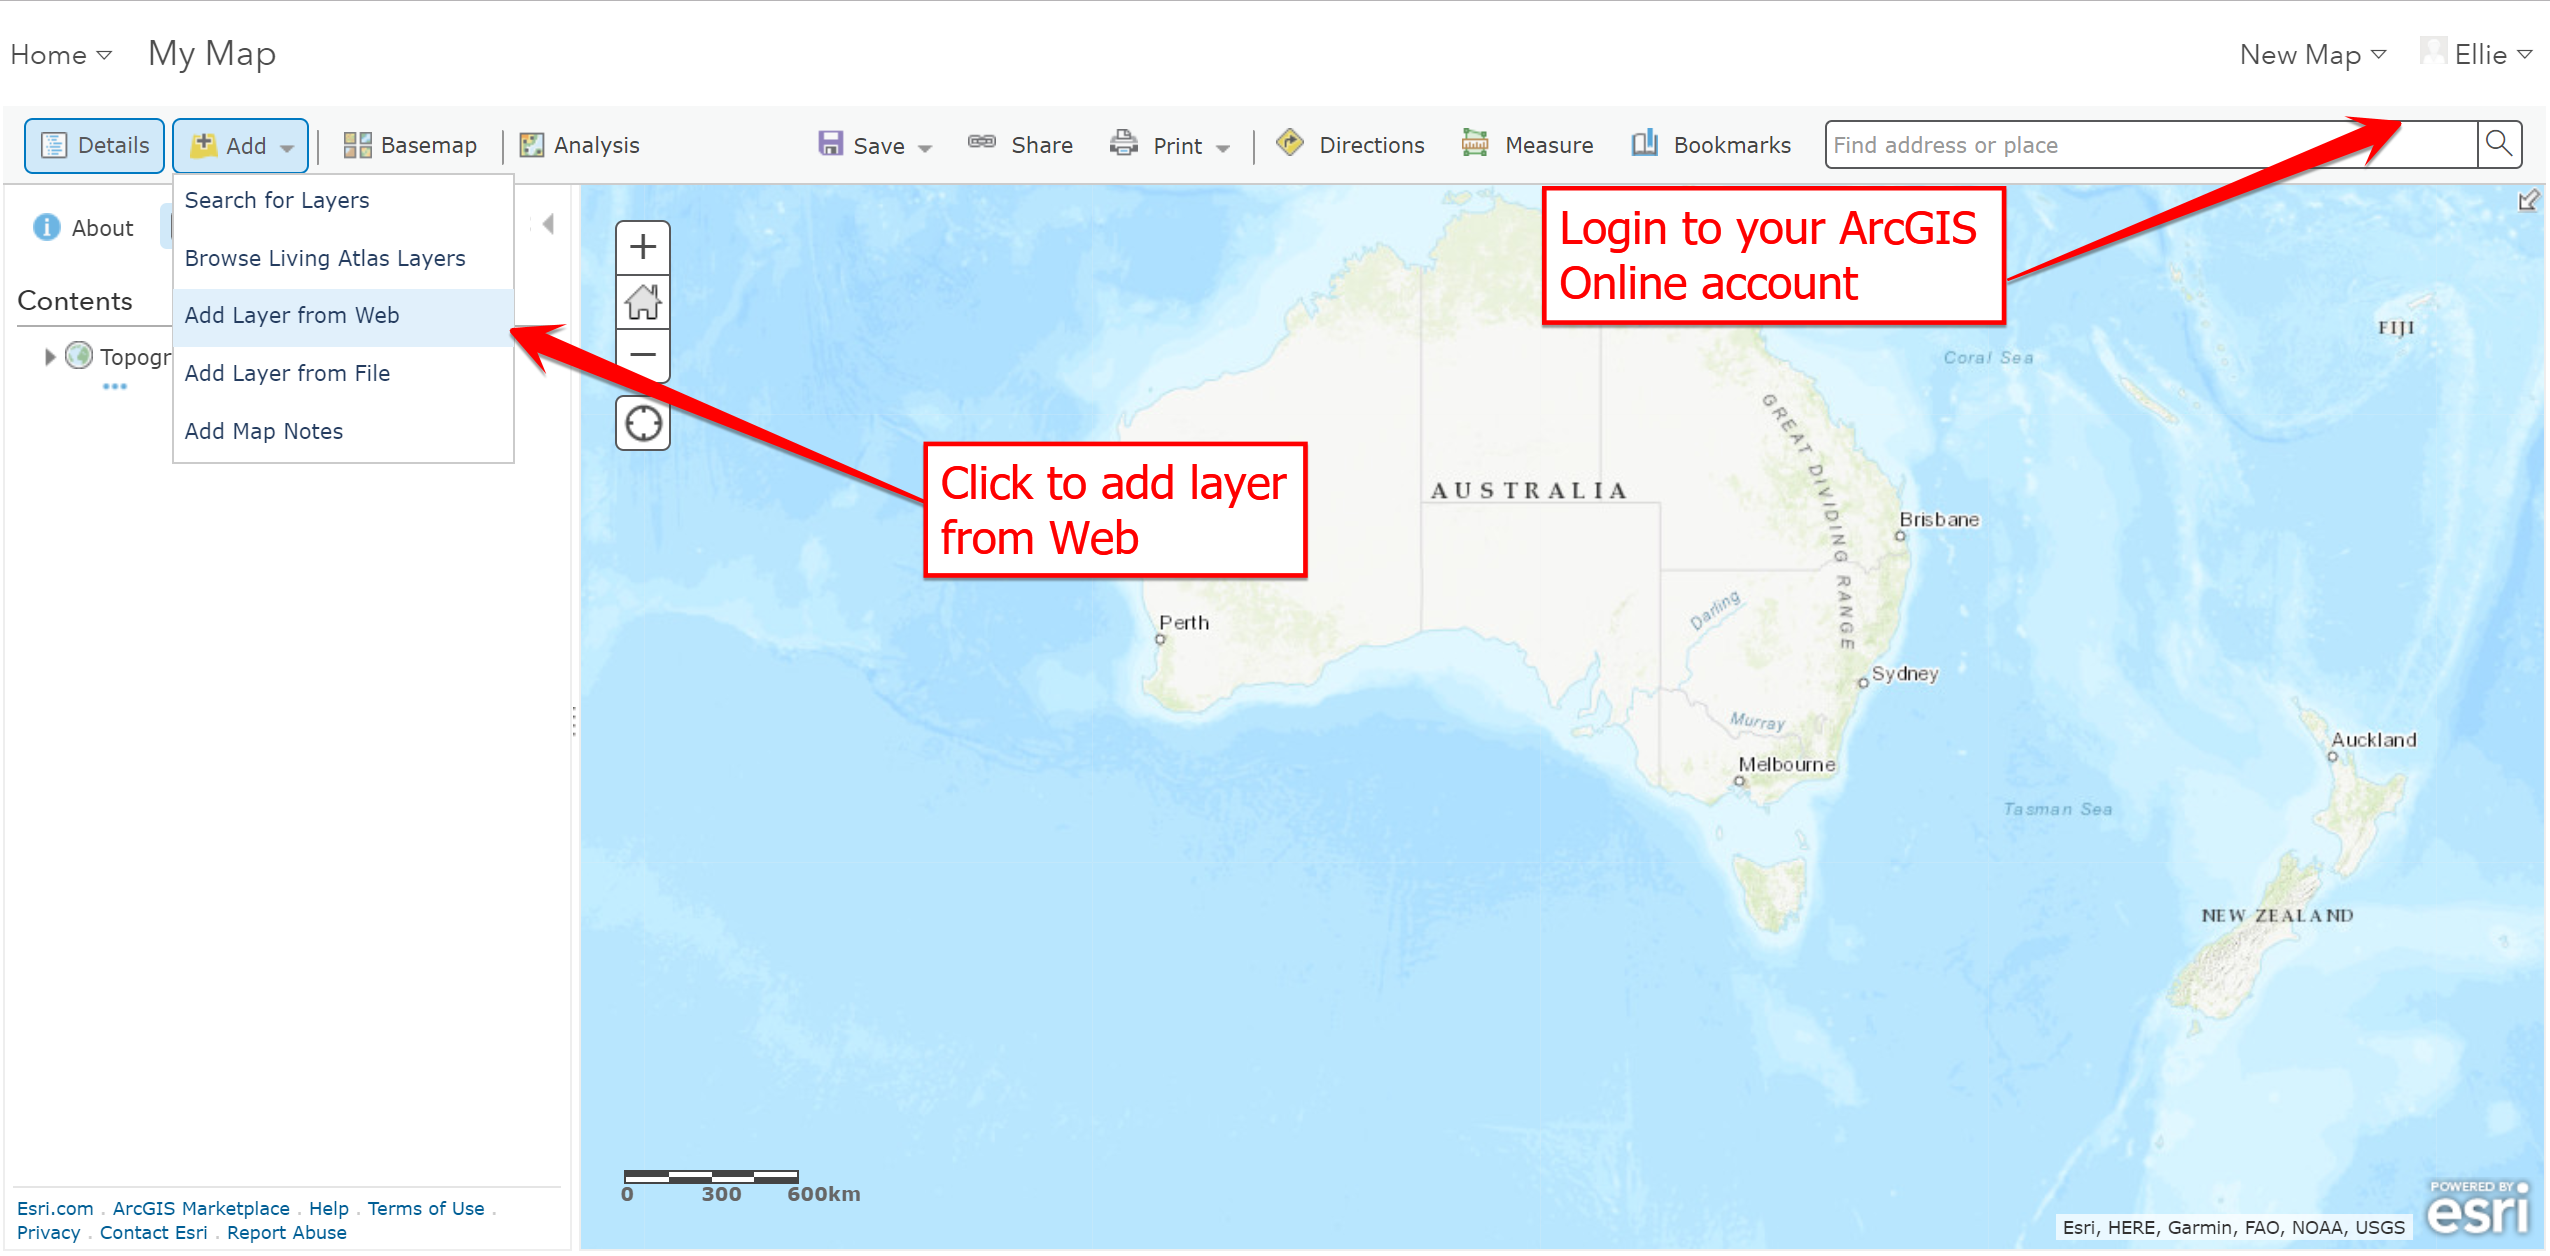
This method is for connecting directly to our services within a single ArcGIS Map Viewer session and loading an individual imagery layer. Images in this section are from the Classic version of the Map Viewer, however the method is similar for the regular Map Viewer.
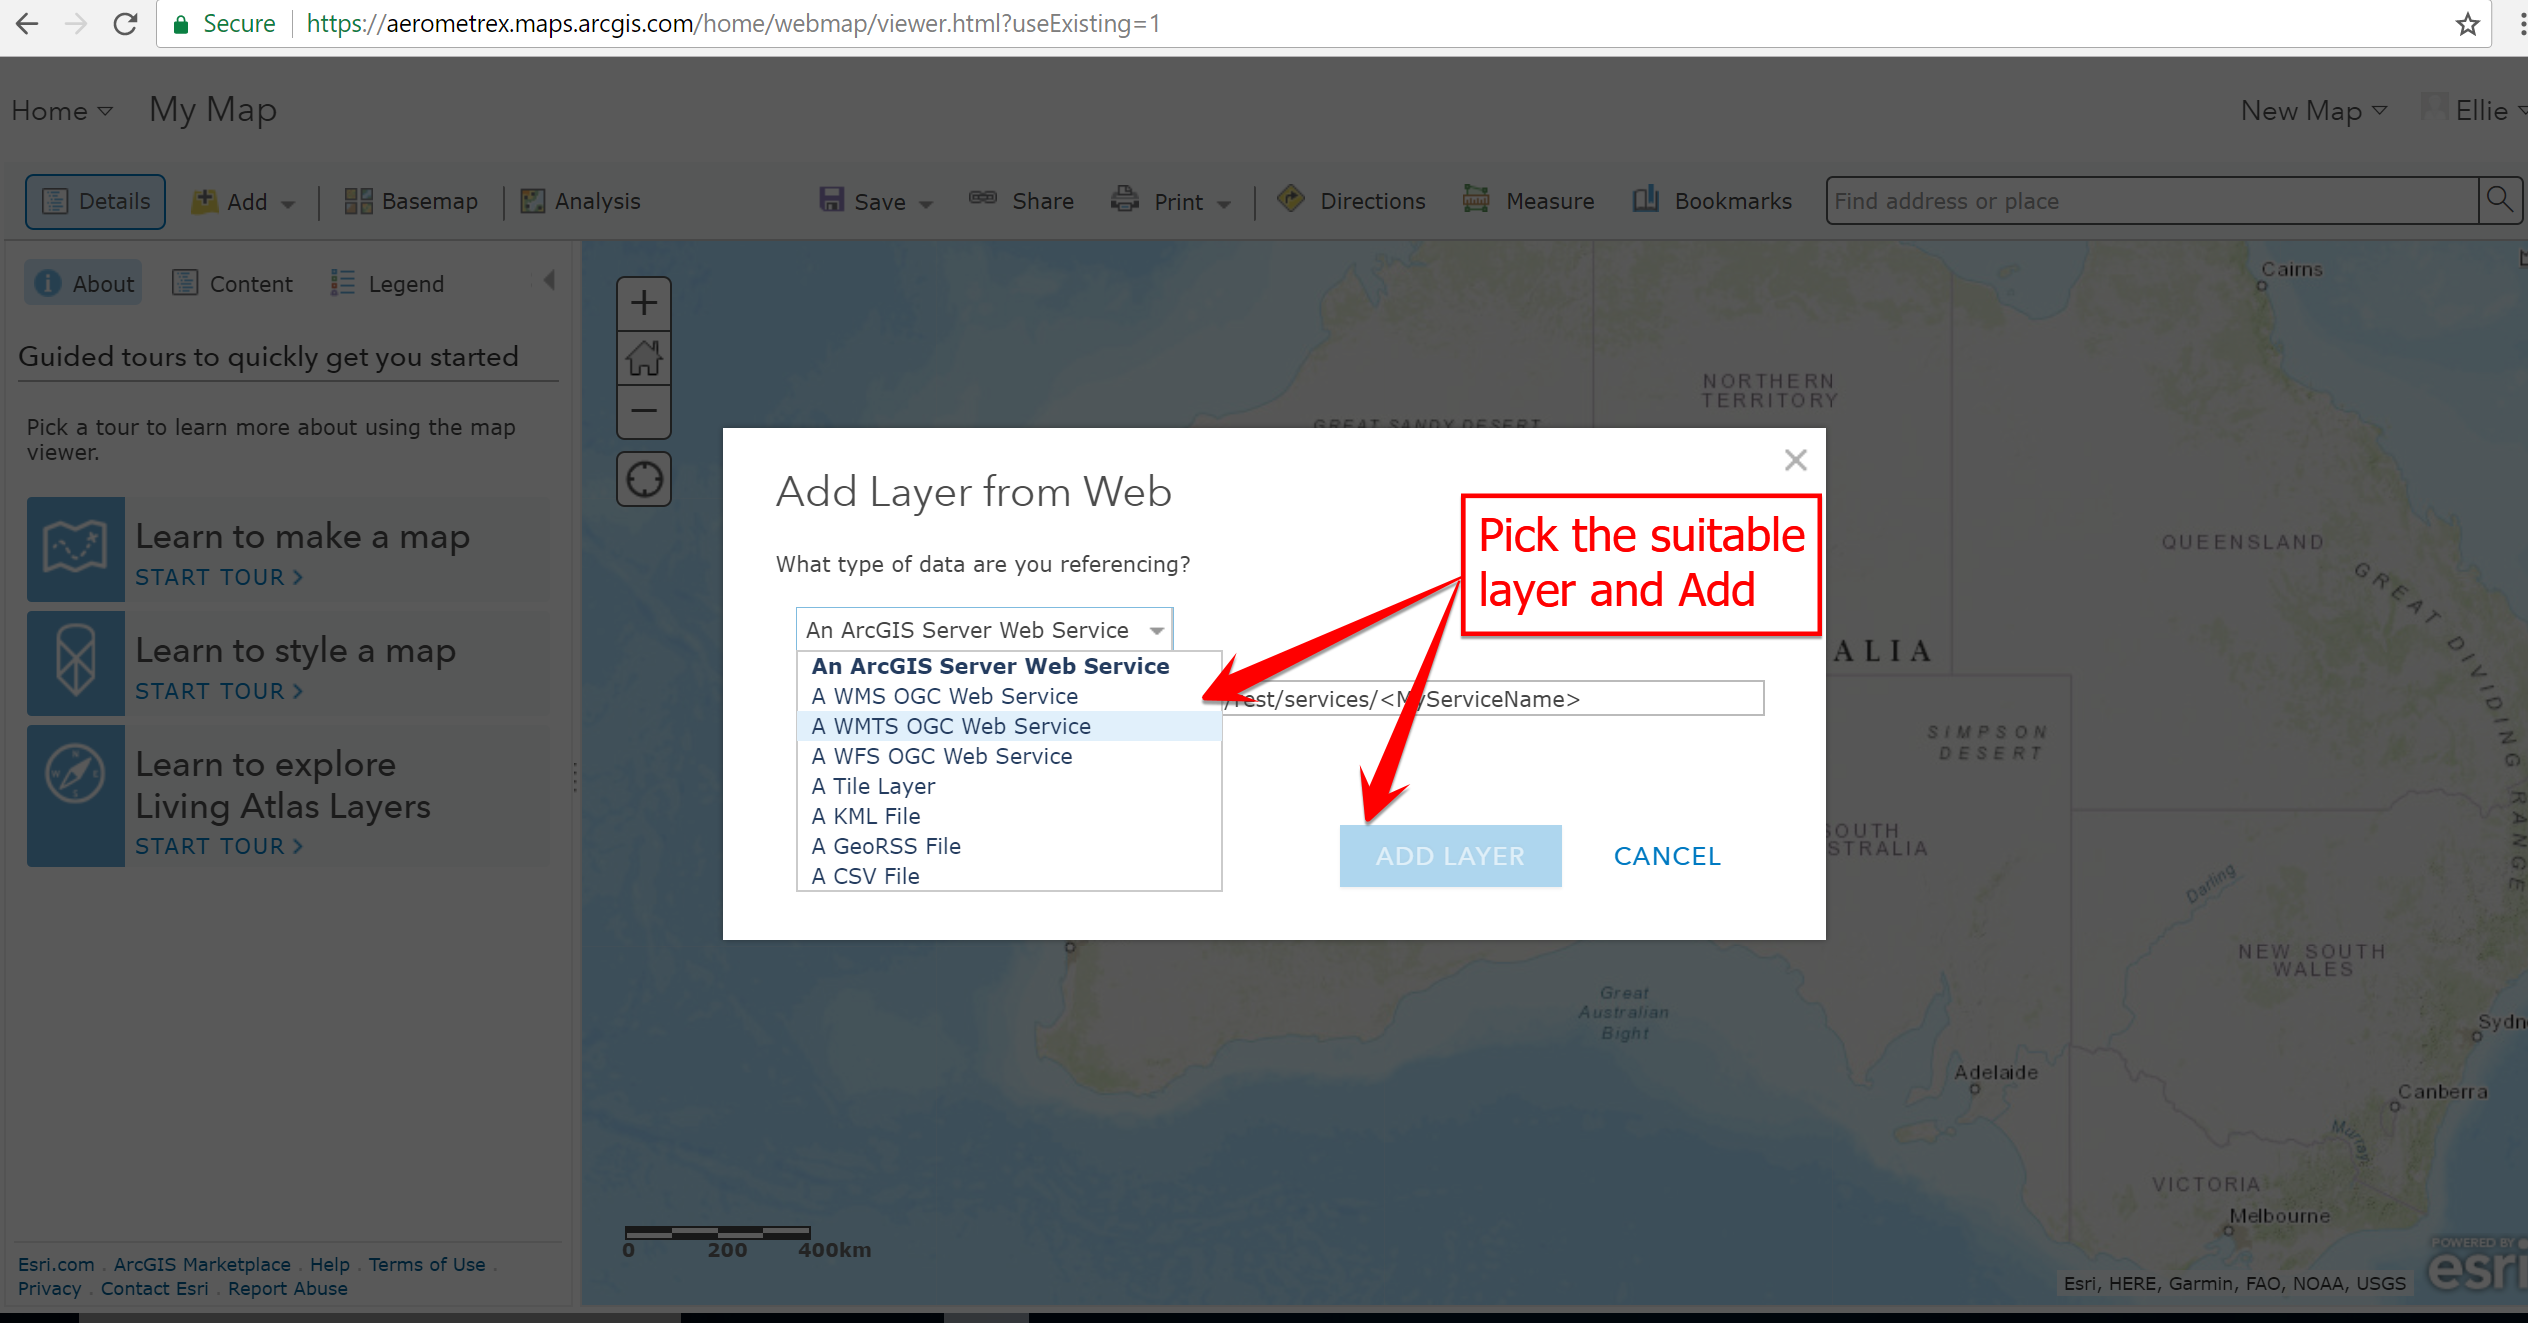
First select the add drop down menu and then select the Add Layer from Web.
Choose between our WMTS or WMS OGC web services as both options are available here.
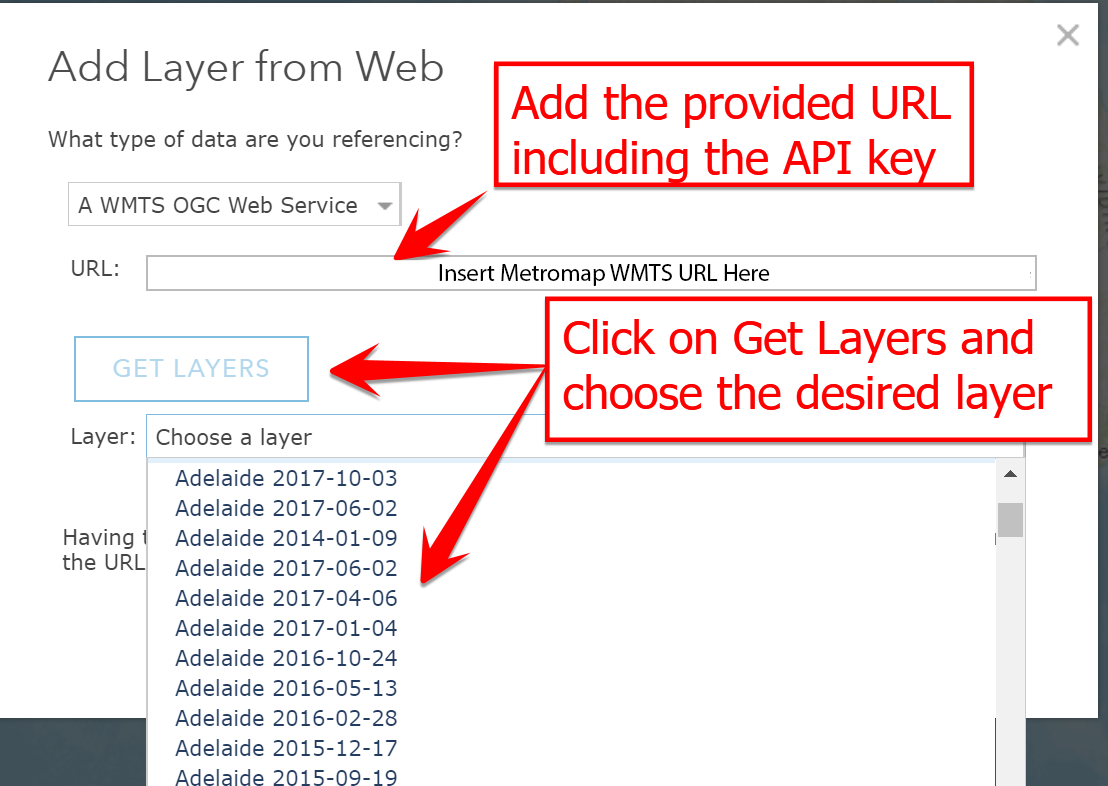
Once your preferred web service has been selected, create and input your URL. For this, refer to either WMS or WMTS for the correct URL format depending on which service you would like, and then embed your MetroMap API key within to replace the URL's "{YOUR-API-KEY}" section.
Click the layer drop down box and select your desired imagery. Once chosen click the Get Layers button.
Occasionally, the method above might not work successfully, therefore use the steps below:
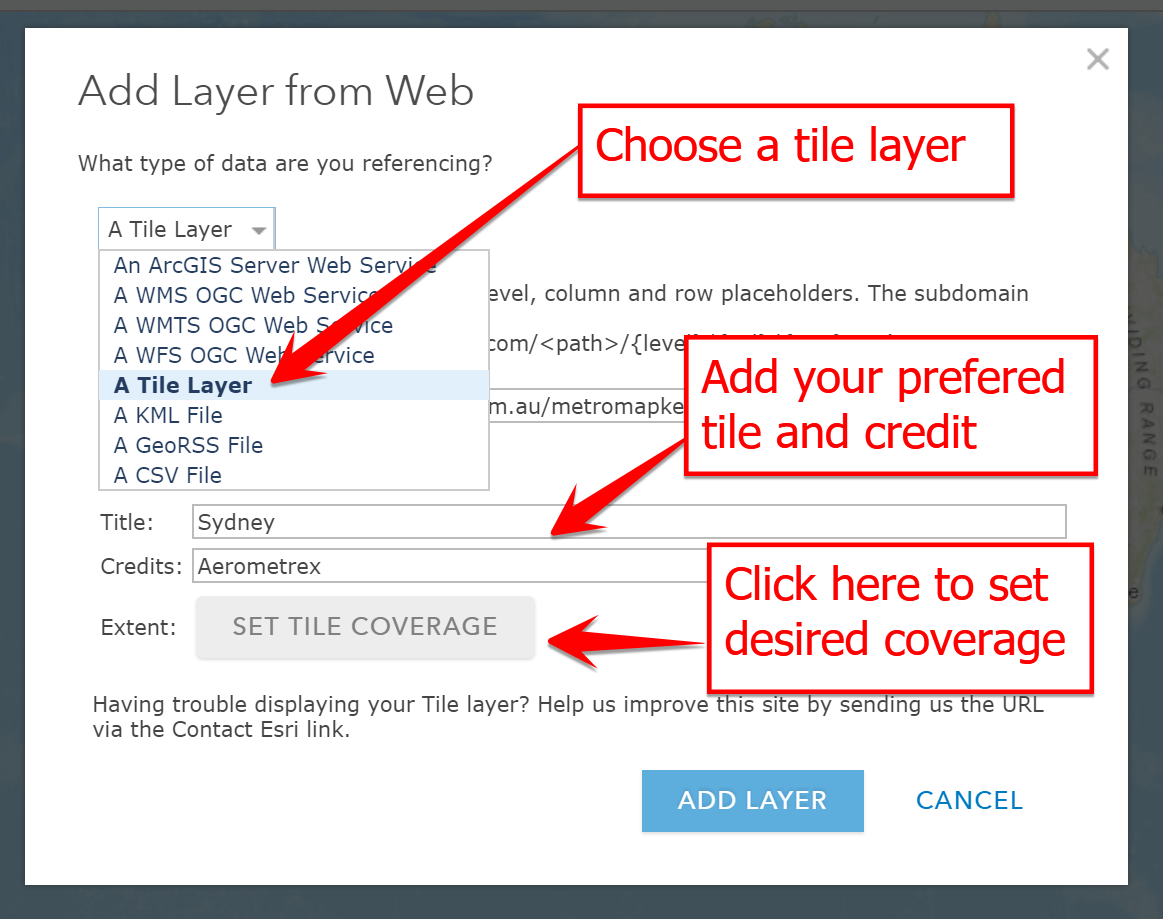
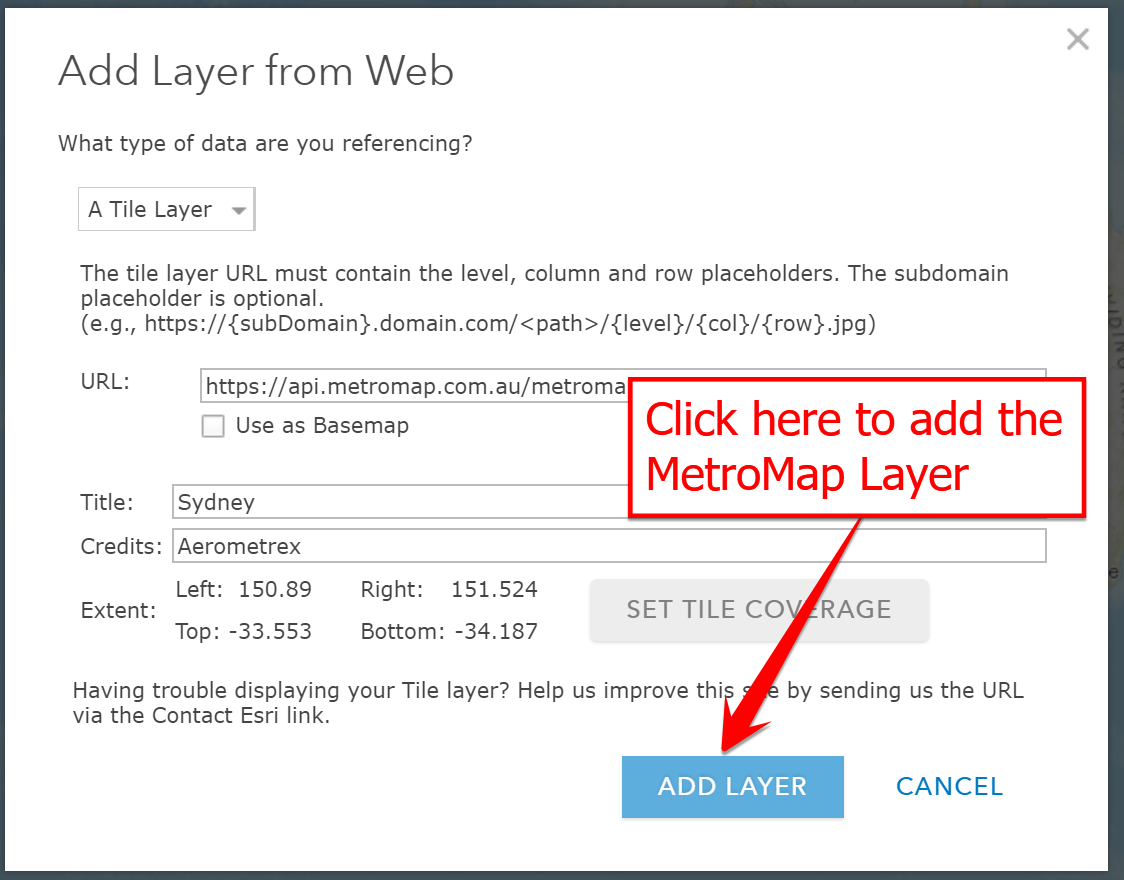
3. Custom Tile Layer Setup
For this method, below is the URL to use (GetTile Request) which requires a valid API key. To utilise historical imagery here, you are welcome to change the layer parameter (LAYER=) response which will subsequently change the MetroMap capture layer, just make sure that your set tile coverage extent coincides with the chosen layer's coverage.
https://api.metromap.com.au/ogc/key/YOUR-API-KEY/service?SERVICE=WMTS&REQUEST=GetTile&VERSION=1.0.0&LAYER=Australia_latest&STYLE=&FORMAT=image/png&TILEMATRIXSET=webmercator&TILEMATRIX={level}&TILEROW={row}&TILECOL={col}
In your URL, the {level}, {row} and {col} are set by ArcGIS Online to fetch the correct tile, so these should not be changed.
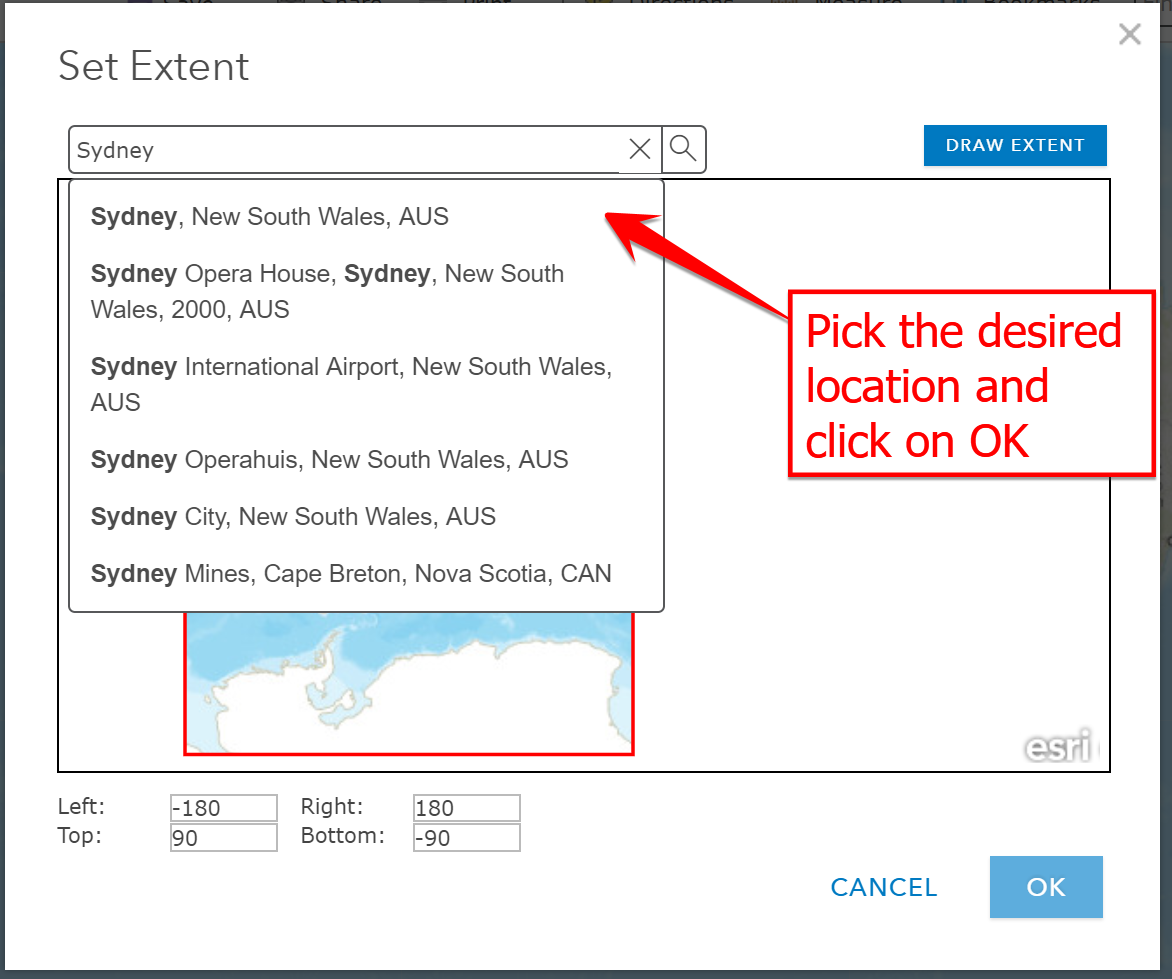
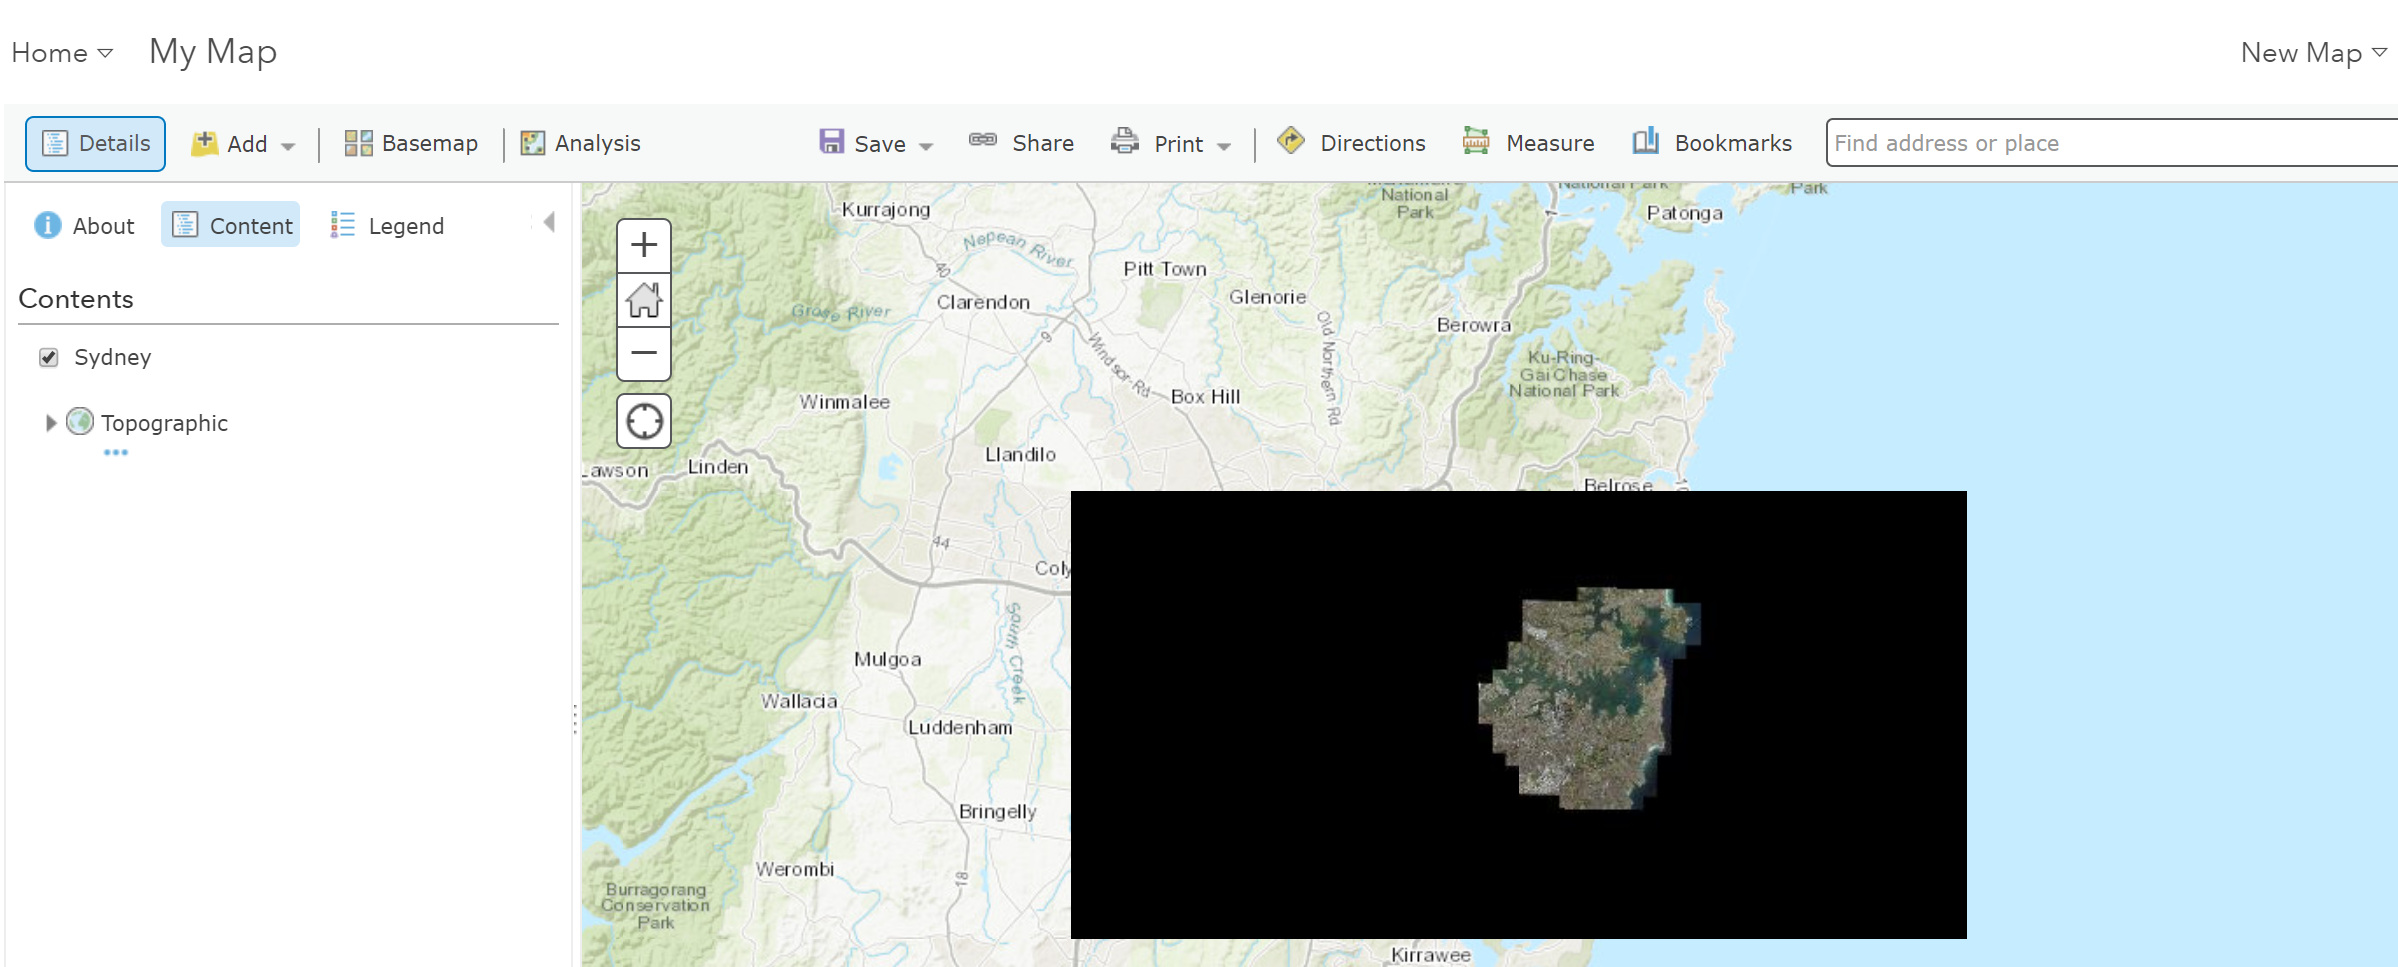
Setting up the extent:
3. Scene Viewer Setup
-
Log in to ArcGIS Online and navigate to content.
-
Fill out the following details, for the URL replace {YOUR_API_Key} with your key.
Either
https://api.metromap.com.au/ogc/key/{YOUR_API_KEY}/service?REQUEST=GetCapabilities&SERVICE=WMTS
or
https://api.metromap.com.au/ogc/gda2020/key/{YOUR_API_KEY}/service?REQUEST=GetCapabilities&SERVICE=WMTS
-
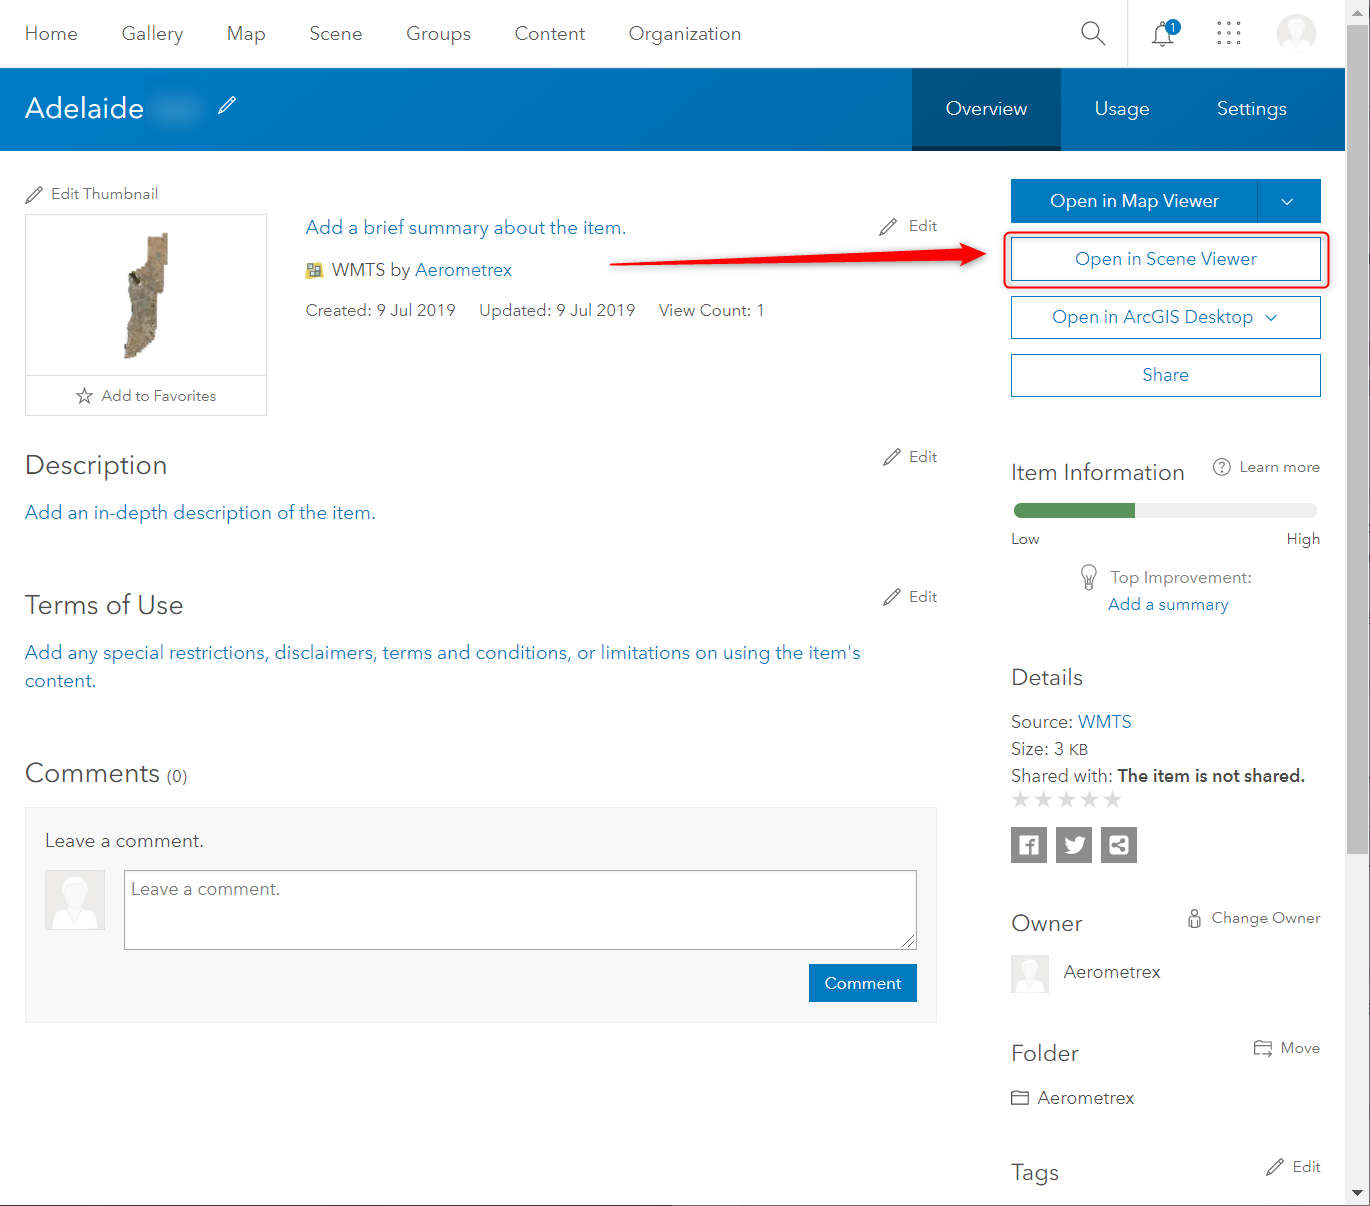
You should then be taken to a page displaying information about the newly created layer. Click "Open in Scene Viewer".

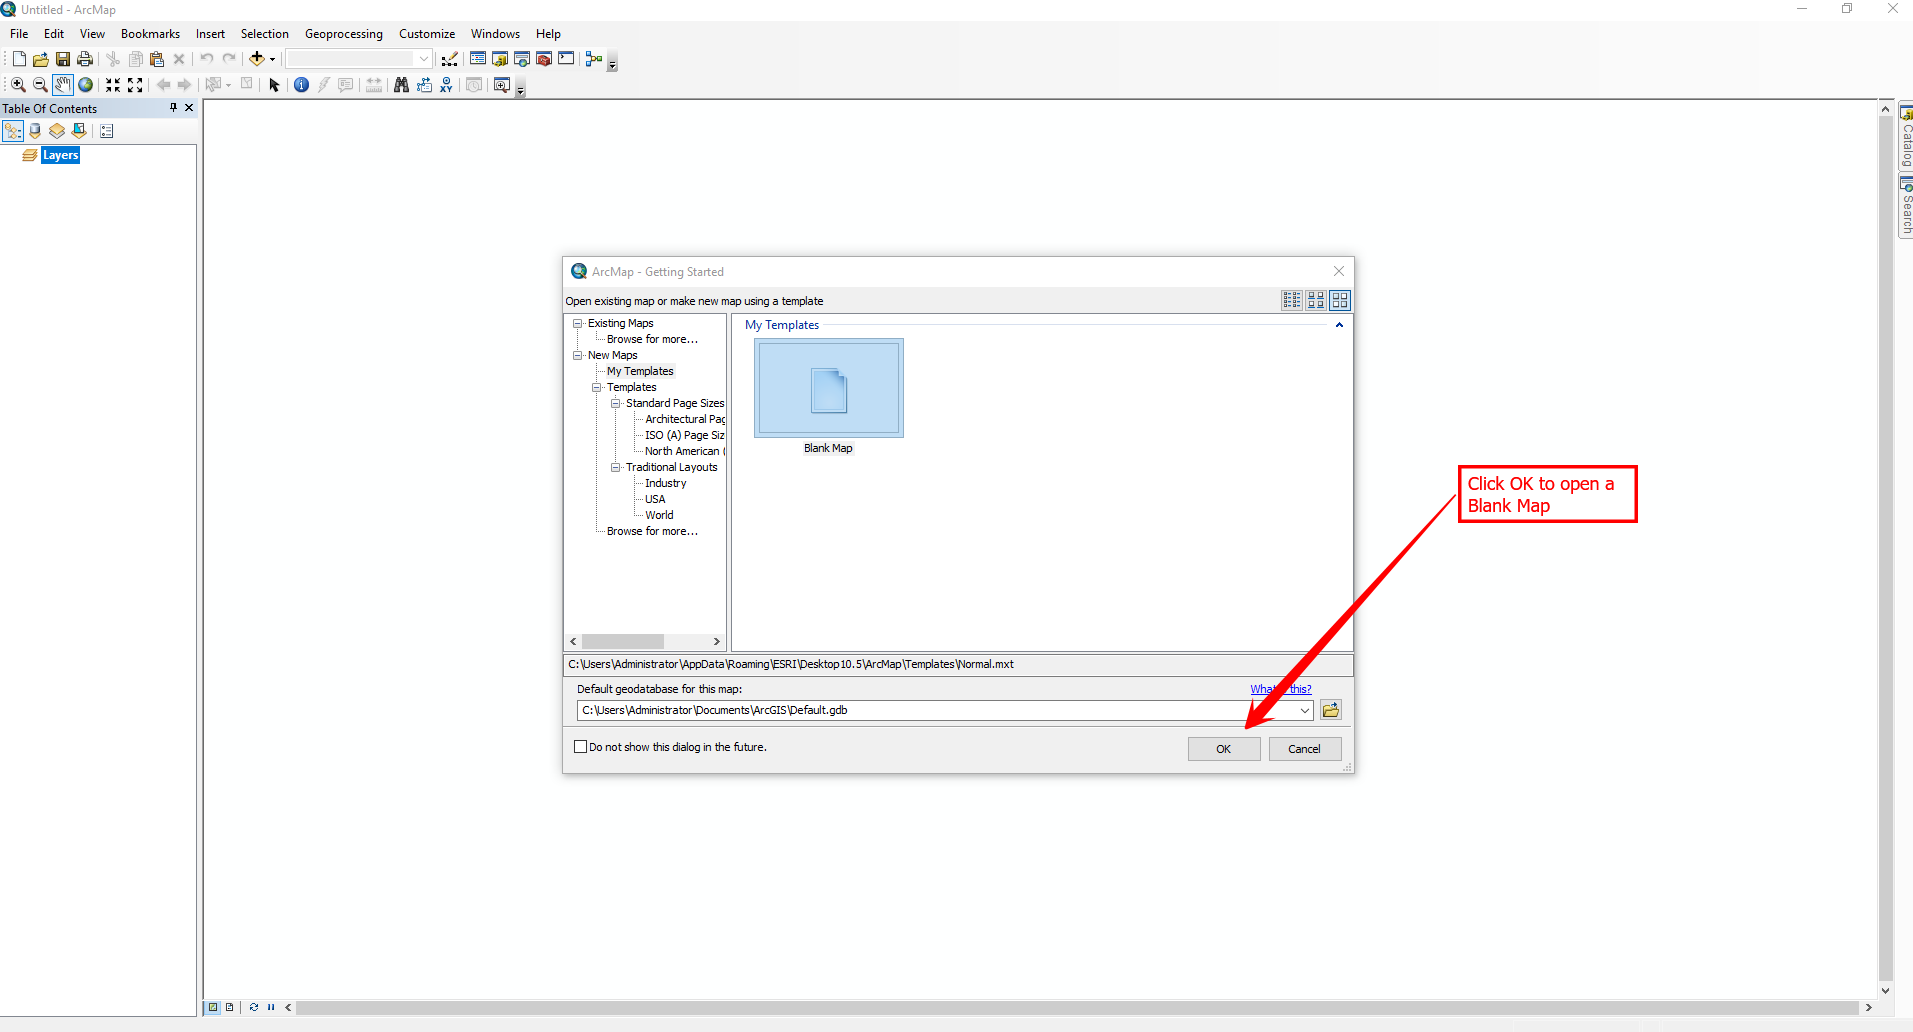
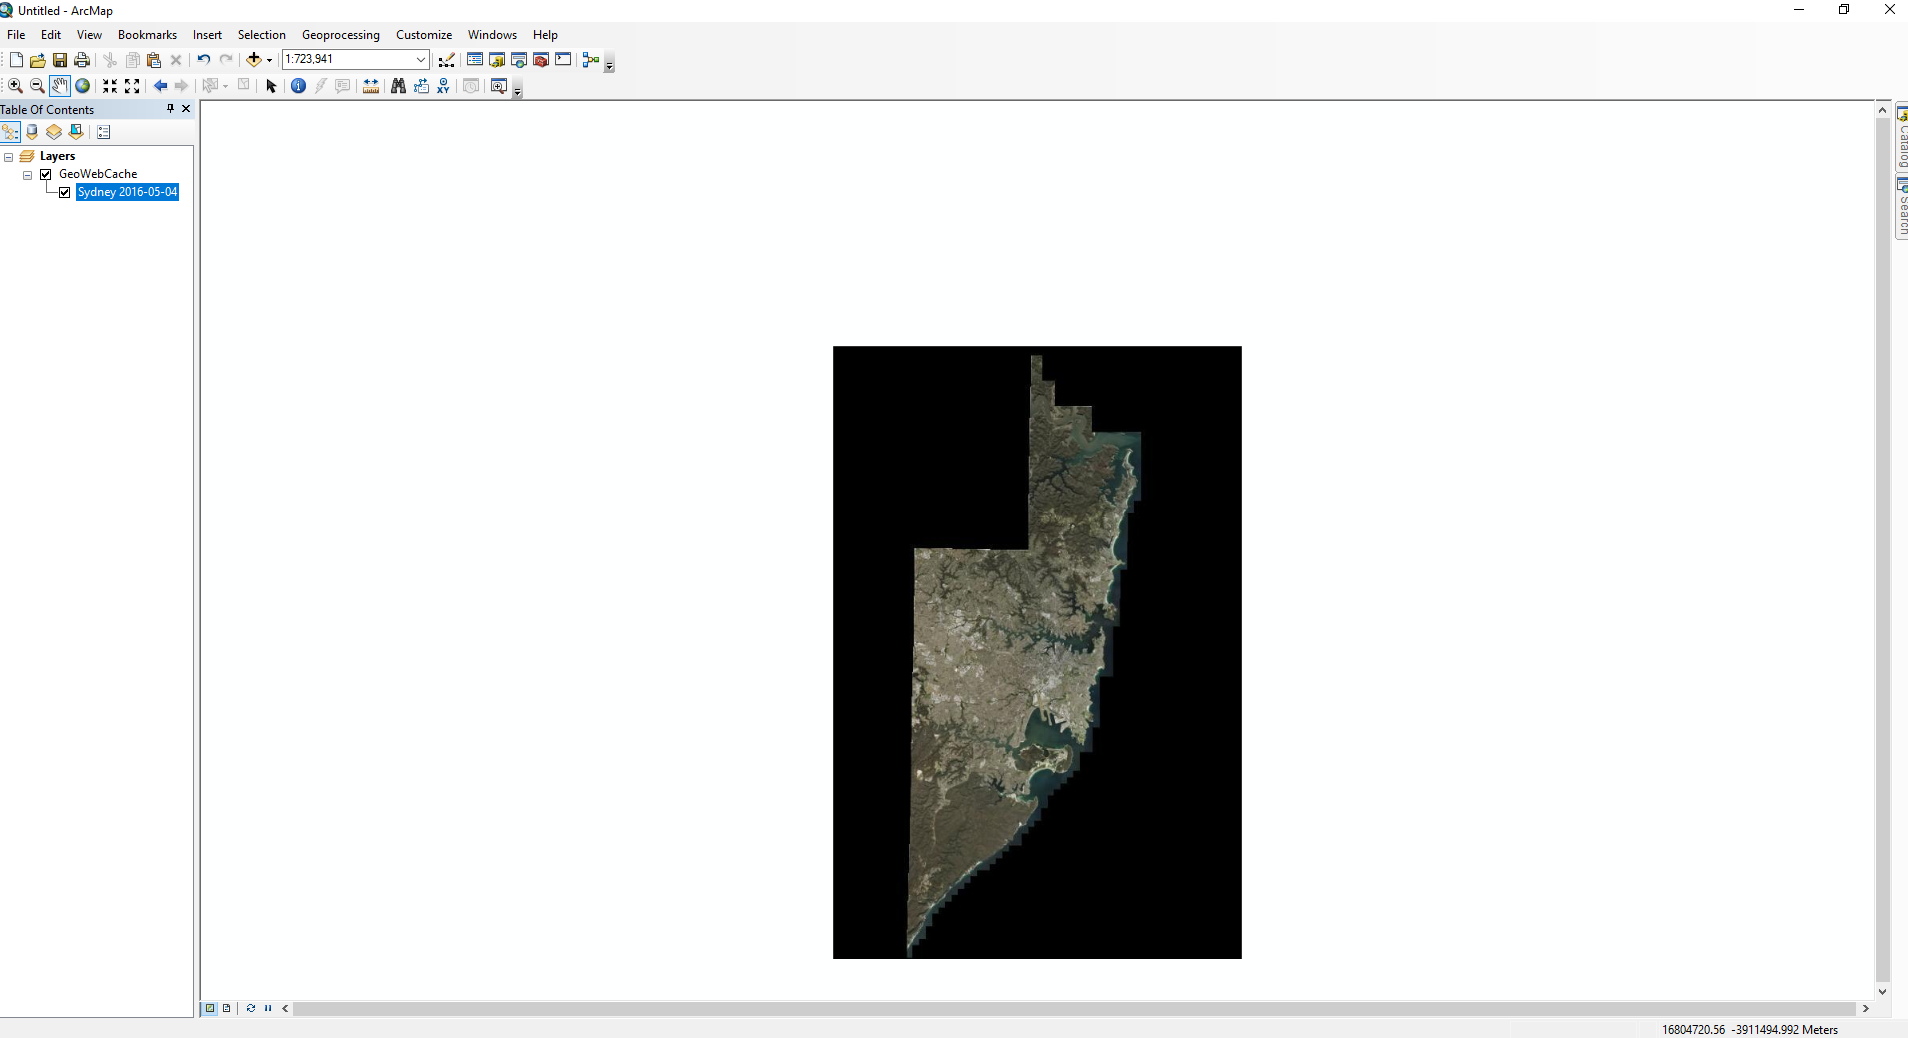
ArcMap 10.x
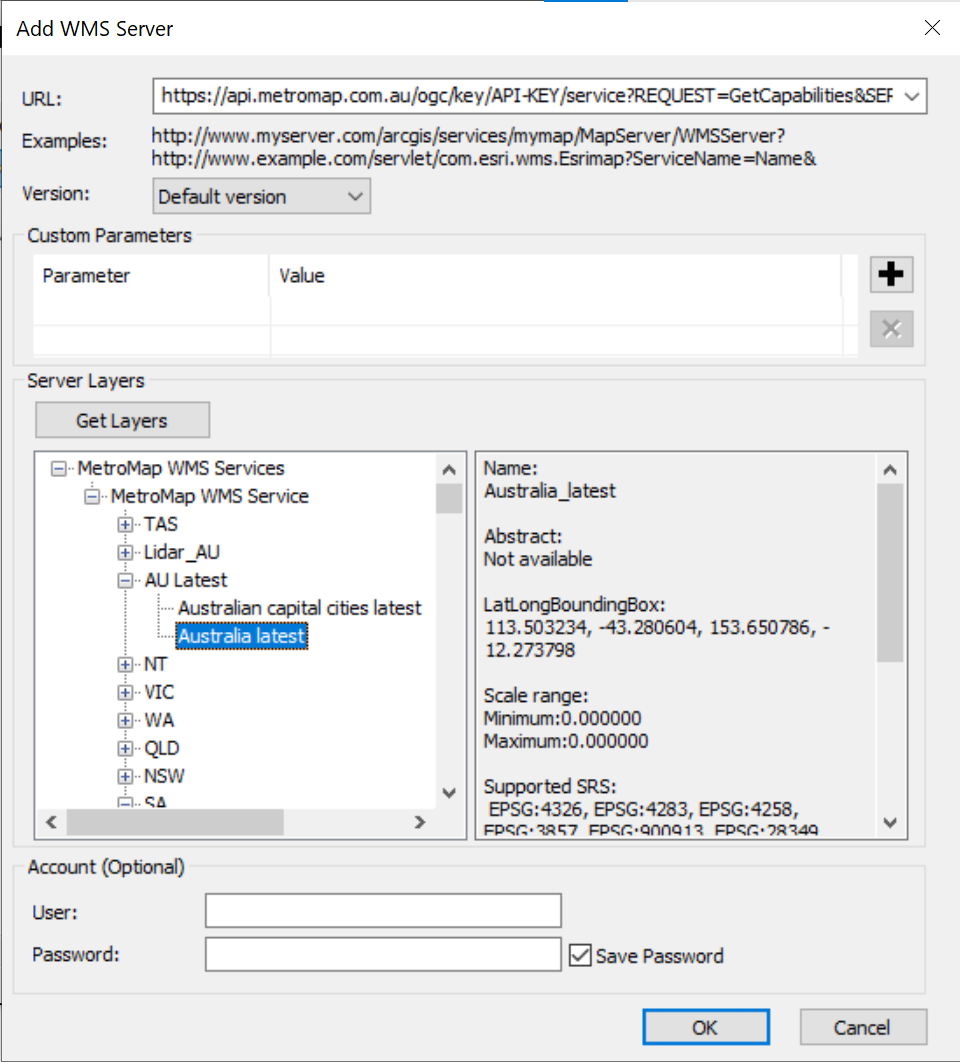
Setting up a WMS Service in ArcMap
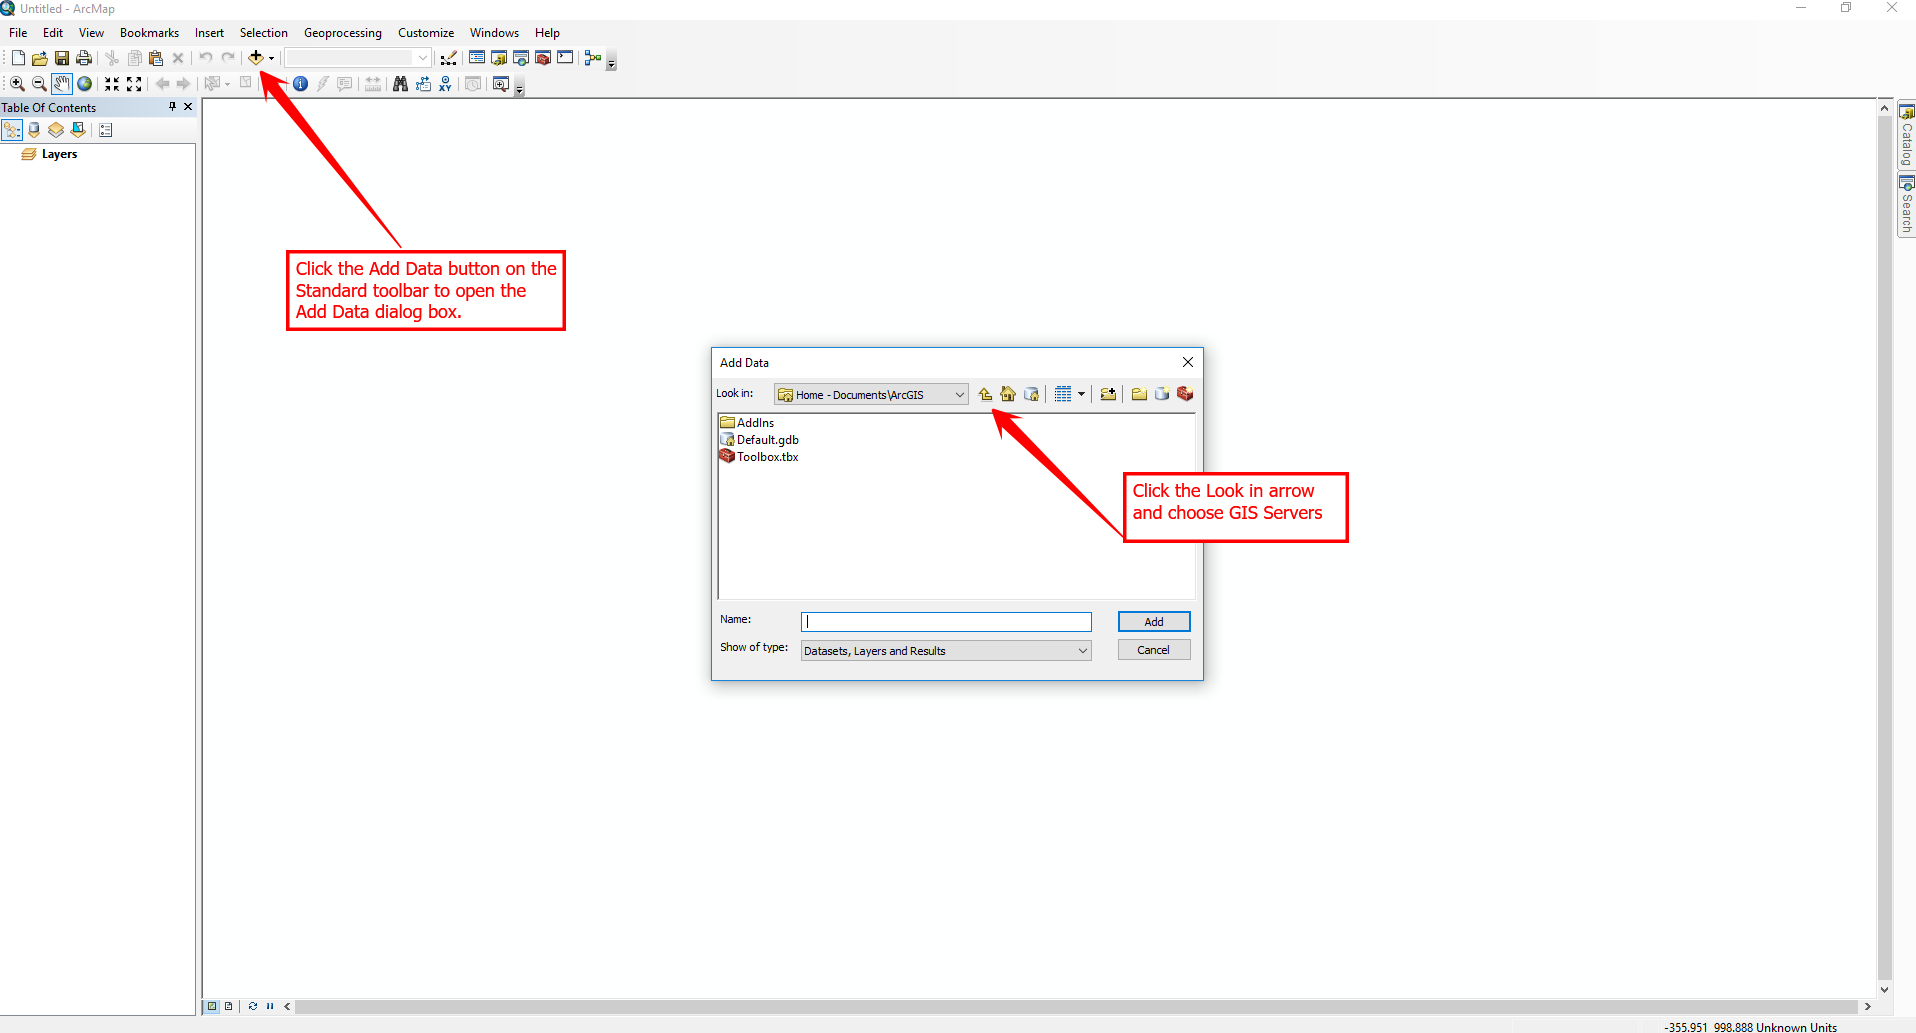

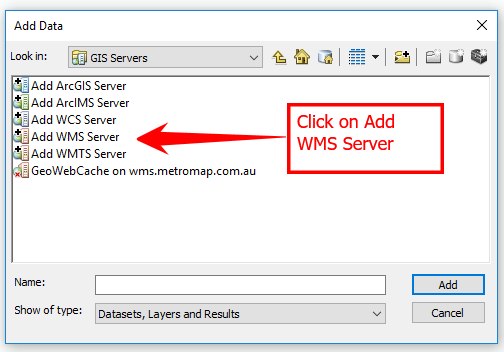
In the Add WMS Server window, name your own connection, in the URL field,
Enter
https://api.metromap.com.au/ogc/key/{YOUR_API_KEY}/service?REQUEST=GetCapabilities
Do not enter your User Name and Password.
To enable WMTS choose WMTS Servers from Add data menu and follow same steps as above. Please contact Aerometrex for the WMTS URL.
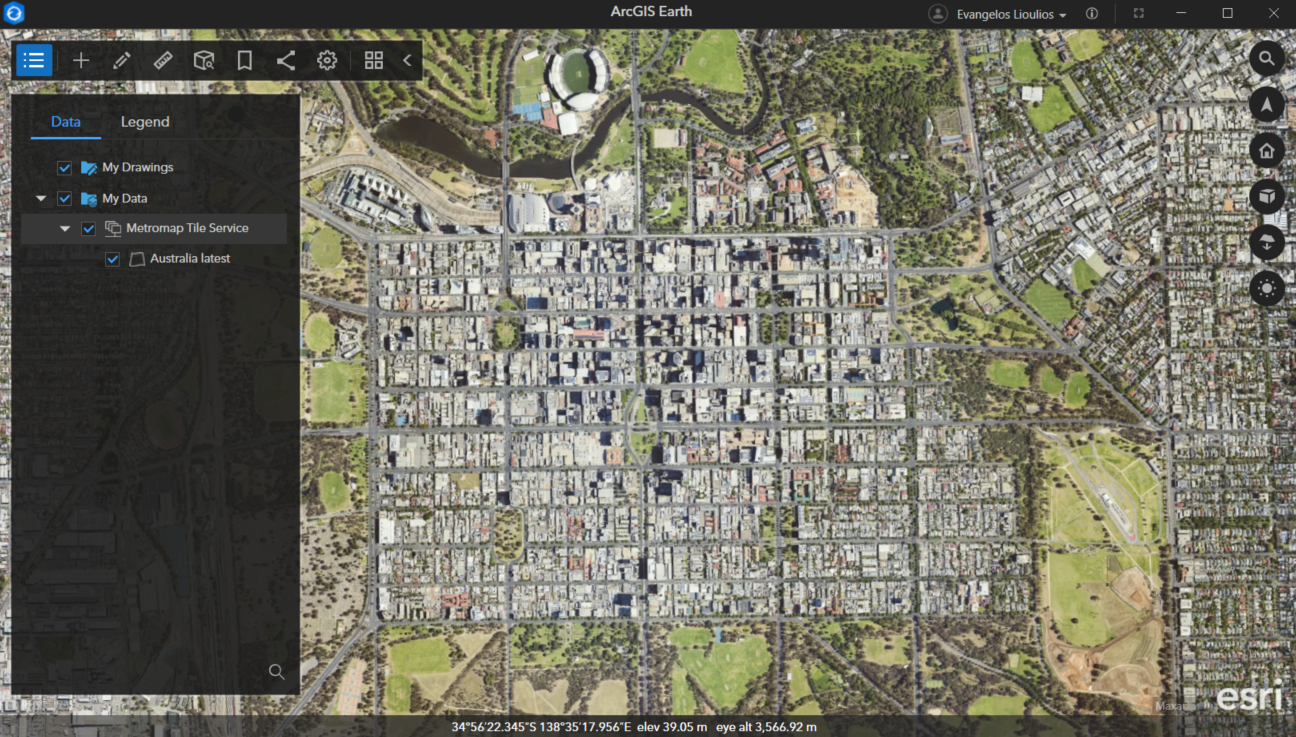
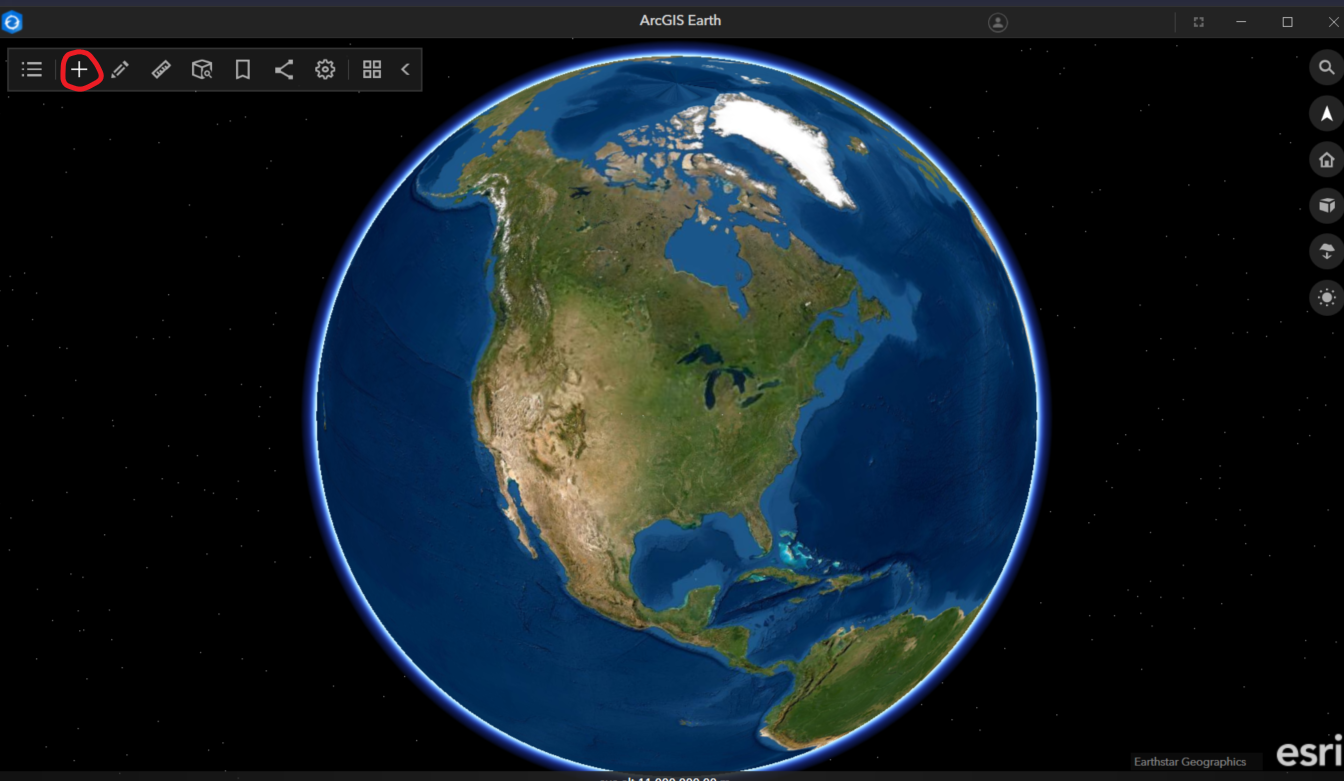
ArcGIS Earth
1. Open ArcGIS Earth and log in.
Click on the + sign in the top left-hand corner.
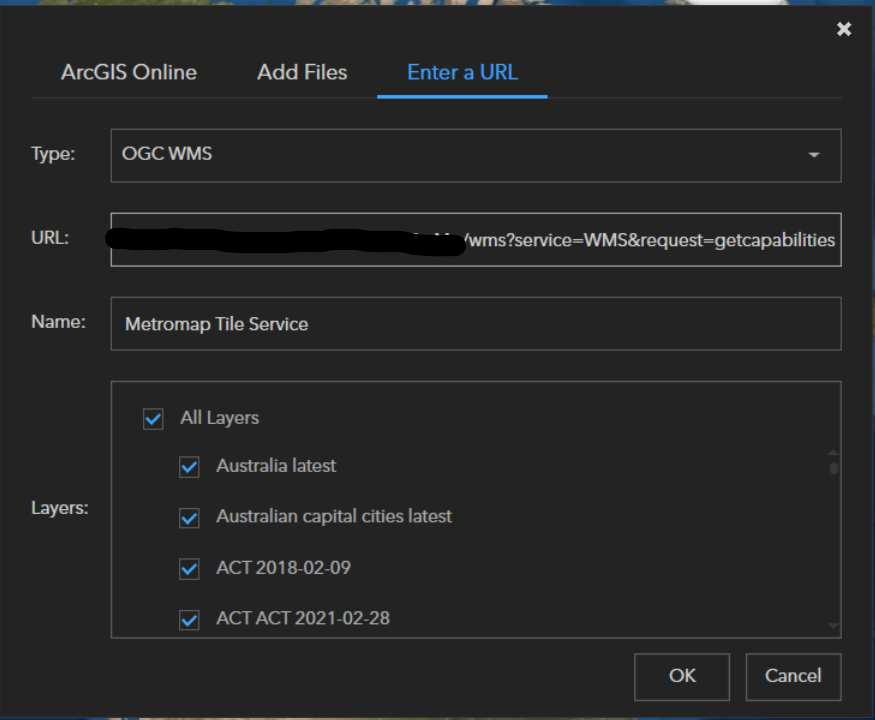
2. Adding either your WMS or WMTS URL
Once the menu appears select the Enter a URL Tab

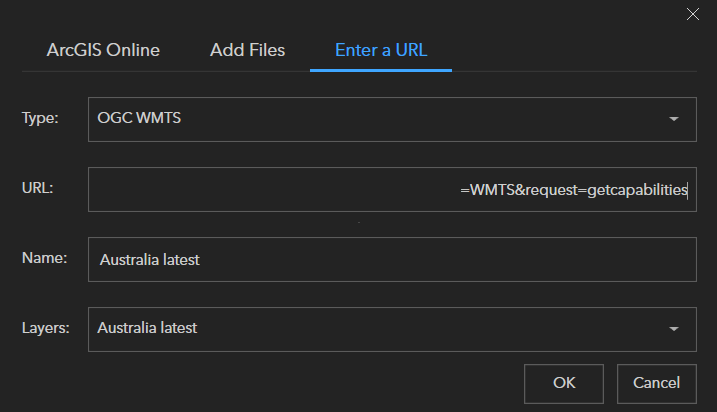
Click on Type.
This will provide a drop-down menu which will allow you to select either the WMS or WMTS service. Then enter your MetroMap URL with your API Key embedded within. Wait for your layer names to populate.
Finally select your desired Layers in the Name menu (we recommended using the Australia Latest layer). Then click ok.
Your chosen layer will now be uploaded and visible within your Table of Contents.