Beta Feature: MetroMap Obliques Imagery is currently in beta mode and is subject to refinement and change.
Overview
The MetroMap Obliques feature provides aerial images captured at an approximate 45° viewing angle, offering side-on perspectives alongside traditional overhead imagery.
This oblique viewpoint allows users to better visualise structures, terrain, and features that may be obscured or unclear from standard vertical aerial views.
Practical applications include:
-
Site Planning & Feasibility Assessment
Evaluate locations effectively by viewing structures and their surrounding context from multiple angles to inform design, development, and planning decisions. -
Property & Asset Inspections
Gain improved visibility of building façades, infrastructure, and assets to support assessments, maintenance planning, and reporting. -
Risk & Accessibility Assessment
Identify hazards, access points, and site constraints that may be hidden in standard aerial views. -
Change Monitoring & Documentation
Track changes over time from different perspectives to enable more informed decision-making and maintain historical records.
User Guide
Step 1: Select the Oblique Imagery layer
Description:
From the layer menu, select the MetroMap Obliques layer to prepare the map for displaying oblique views.
Layers for Oblique Imagery will have an icon displayed next to the date

Step 2: Turn on Oblique viewing mode
Warning: If this step is skipped, only vertical images will be shown.
Description:
Click the Obliques button ![]() to switch from standard vertical (nadir) imagery to angled oblique views for the selected date. If this step is skipped, only vertical images will be shown.
to switch from standard vertical (nadir) imagery to angled oblique views for the selected date. If this step is skipped, only vertical images will be shown.
![]()
Step 3: Change the viewing direction
Description:
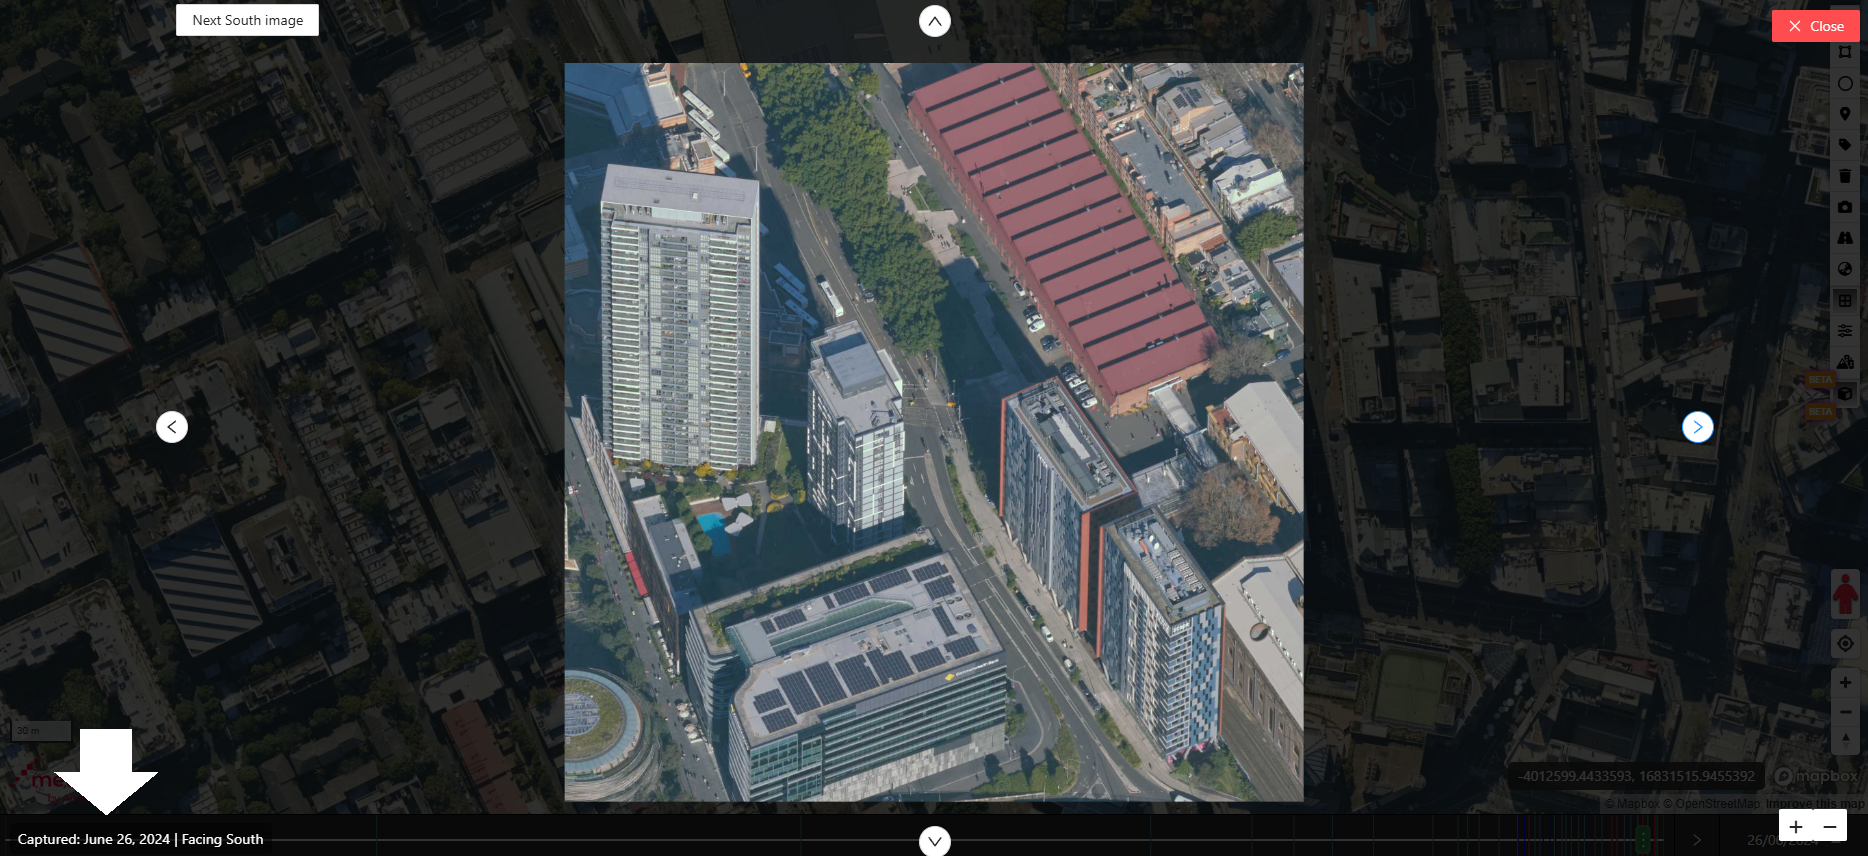
Use the directional controls (e.g., North, South, East, West) to view the location from different angles.

Step 4: Check the image capture date
Description:
Confirm when the imagery was captured by checking the date displayed on the lower left hand side of the image overlay.
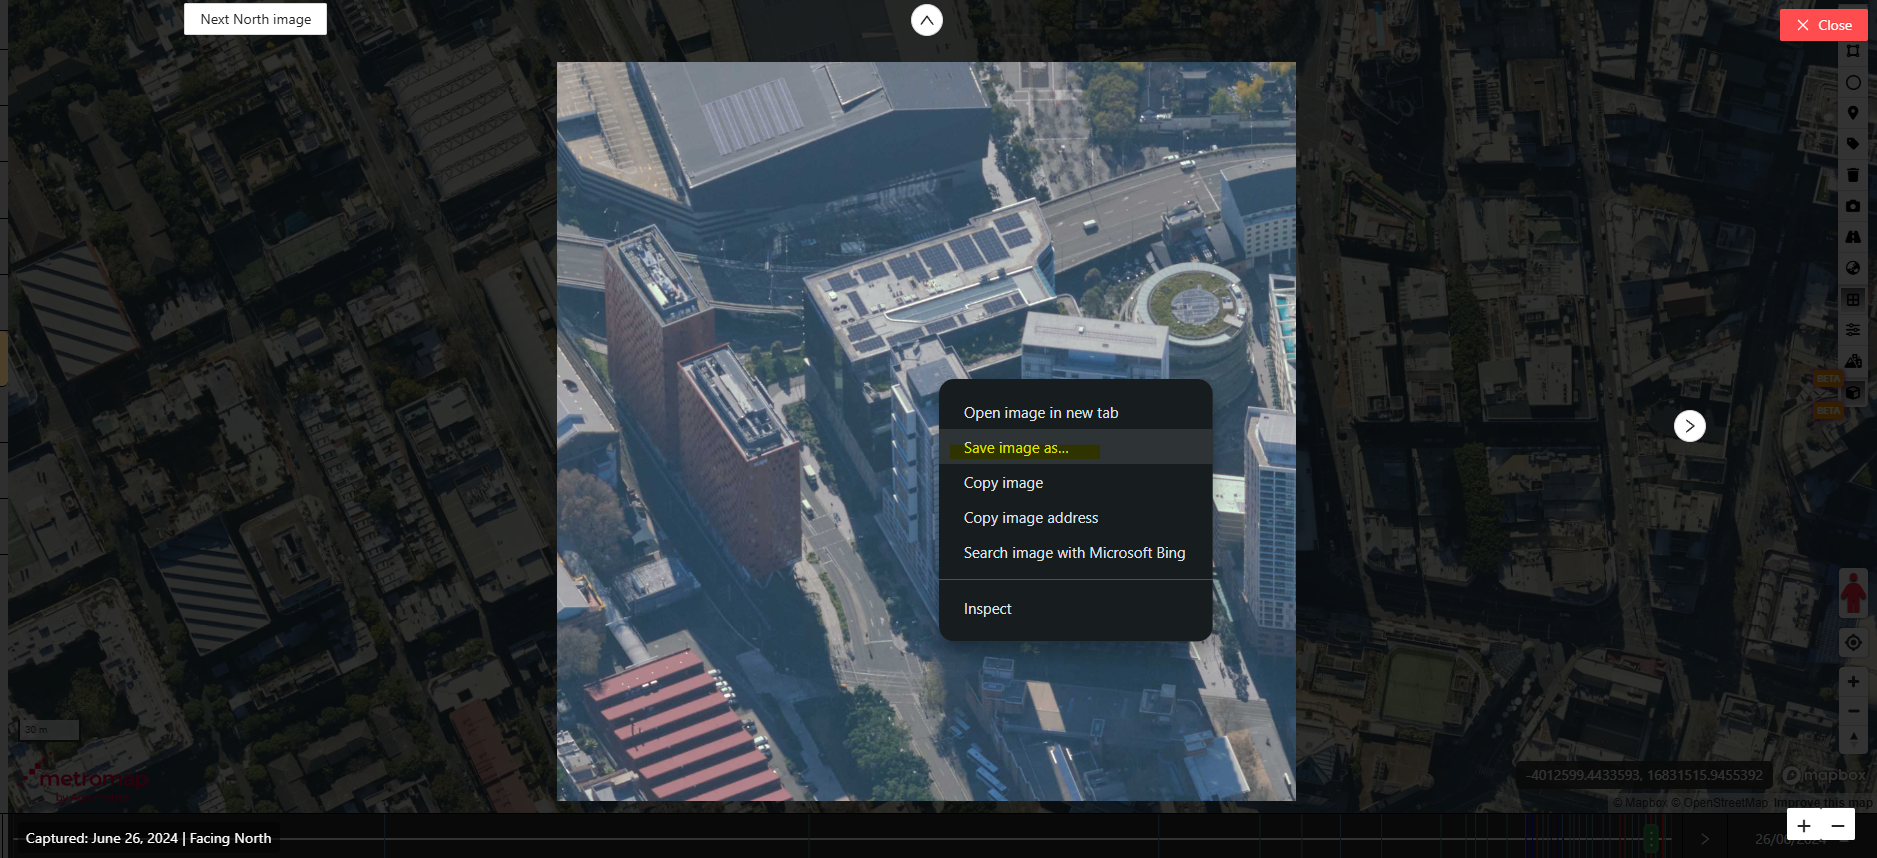
Step 5: Save an image (optional)
Description:
Right-click on the oblique image and choose “Save Image As” from your browser’s menu to download it as a JPEG file.
Tips
- If oblique imagery does not appear, zoom in further or check that your location is within coverage.
- More than one image may be available for each direction — use the navigation controls to browse all options.
- If the Oblique layer is not visible, verify that you have selected the correct layer and are zoomed in to a covered area.
- If you cannot save an image, try your browser’s right-click menu. Note that some browsers may limit image saving depending on settings or permissions.
Need help? Raise a support ticket via our Support Portal.