Before you start
Discover the key features of the MetroMap Browser 3D Interface, including the Overview, Menu, Navigation, and Toolbar tools — and learn how to make the most of them.
1. Overview
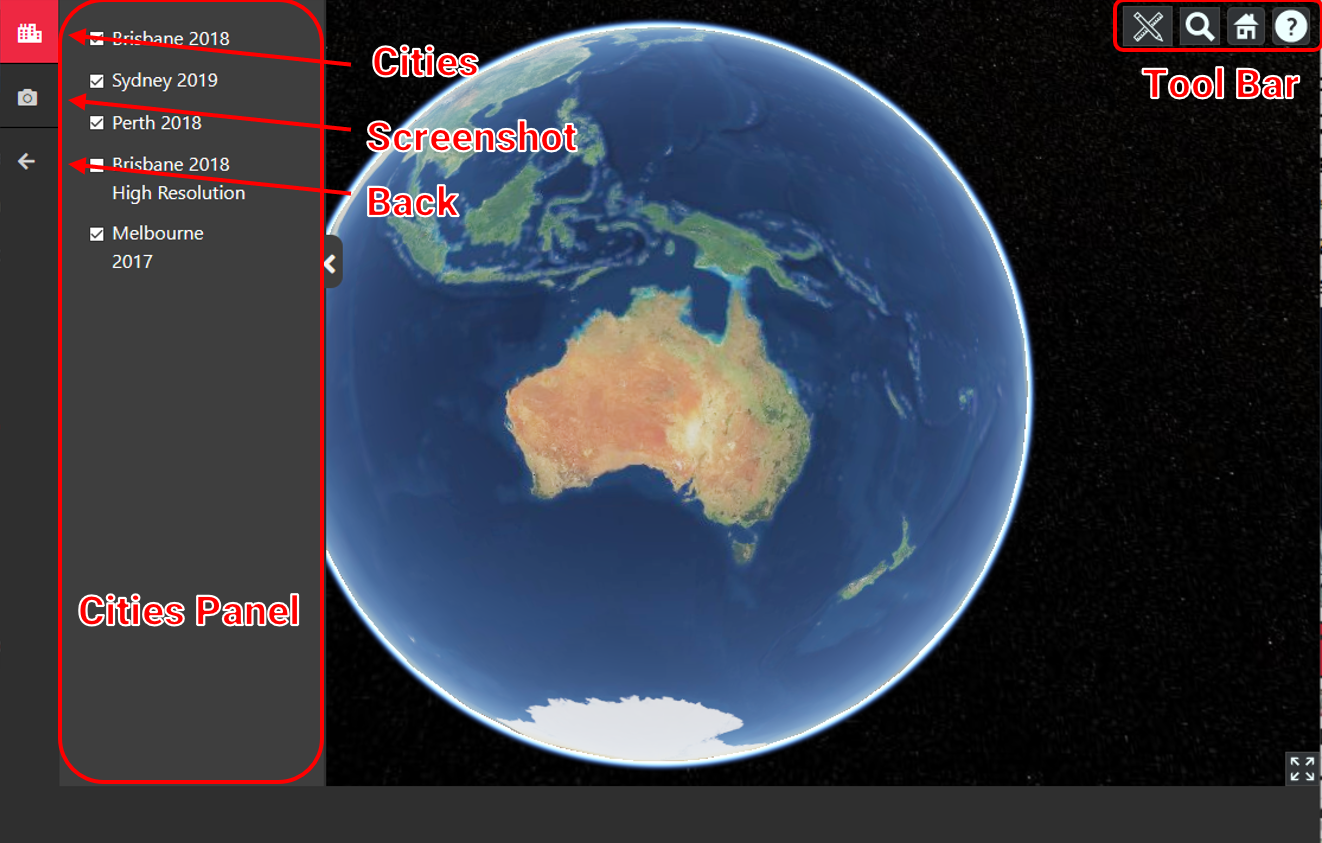
2. Menu
| Icons | Descriptions | |
|---|---|---|
| City | Open/close the Cities panel by clicking the Cities button. | |
| Screenshot | The Screenshot tool allows you to download a screenshot of the current view. | |
| Back | Exit the 3D Viewer. |
3. Navigation
| Mouse | Touch | ||
|---|---|---|---|
 |
Pan view Left click + drag |
 |
Pan view One finger drag |
 |
Zoom view Right click + drag, or Mouse wheel scroll |
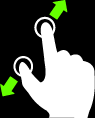 |
Zoom view Two finger pinch |
 |
Rotate view Middle click + drag, or CTRL + Left/Right click + drag |
 |
Tile view Two finger drag, same direction |
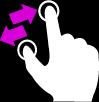 |
Rotate view Two finger drag, opposite direction |
4. Tool Bar
| Icons | Descriptions | |
|---|---|---|
| Measurement | Click the Measurement tools button to open a list of measurement tools. | |
| Search | Hover over the Search button to expand the address bar, which allows you to search for a location. | |
 |
Home | Click the home button to reset the camera to its default position. |
 |
Help | Click for detailed instructions on how to use the tools. |
| Viewshed | Viewshed allows you to see the geographical area that is visible from a location. |
 Measurement
| Icons | Usages | |
|---|---|---|
 |
Distance | 1. Click on the point cloud or the globe to set the start point and end points. 2. To make a new measurement, click to clear the previous measurement |
 |
Component Distance | 1. Click on the point cloud or the globe to set the start point and end points 2. To make a new measurement, click to clear the previous measurement |
 |
Polyline Distance | 1. Click to start drawing a polyline 2. Keep clicking to add more points 3. Double click to finish drawing |
 |
Horizontal distance | 1. Click on the point cloud or the globe to set the start point 2. Move the mouse to drag the line 3. Press this shift key to clamp the direction of the line 4. Click again to set the end point 5. To make a new measurement, click to clear the previous measurement |
 |
Vertical distance | 1. Click on the point cloud or the globe to set the start point 2. Move the mouse to drag the line 3. Click again to set the end point 4. To make a new measurement, click to clear the previous measurement |
 |
Height from terrain | Click on the point cloud to get a distance from that point to terrain |
 |
Area | 1. Click to start drawing a polygon 2. Keep clicking to add more points 3. Double click to finish drawing |
 |
Point coordinates | Move the mouse to see the longitude, latitude and height of the point |
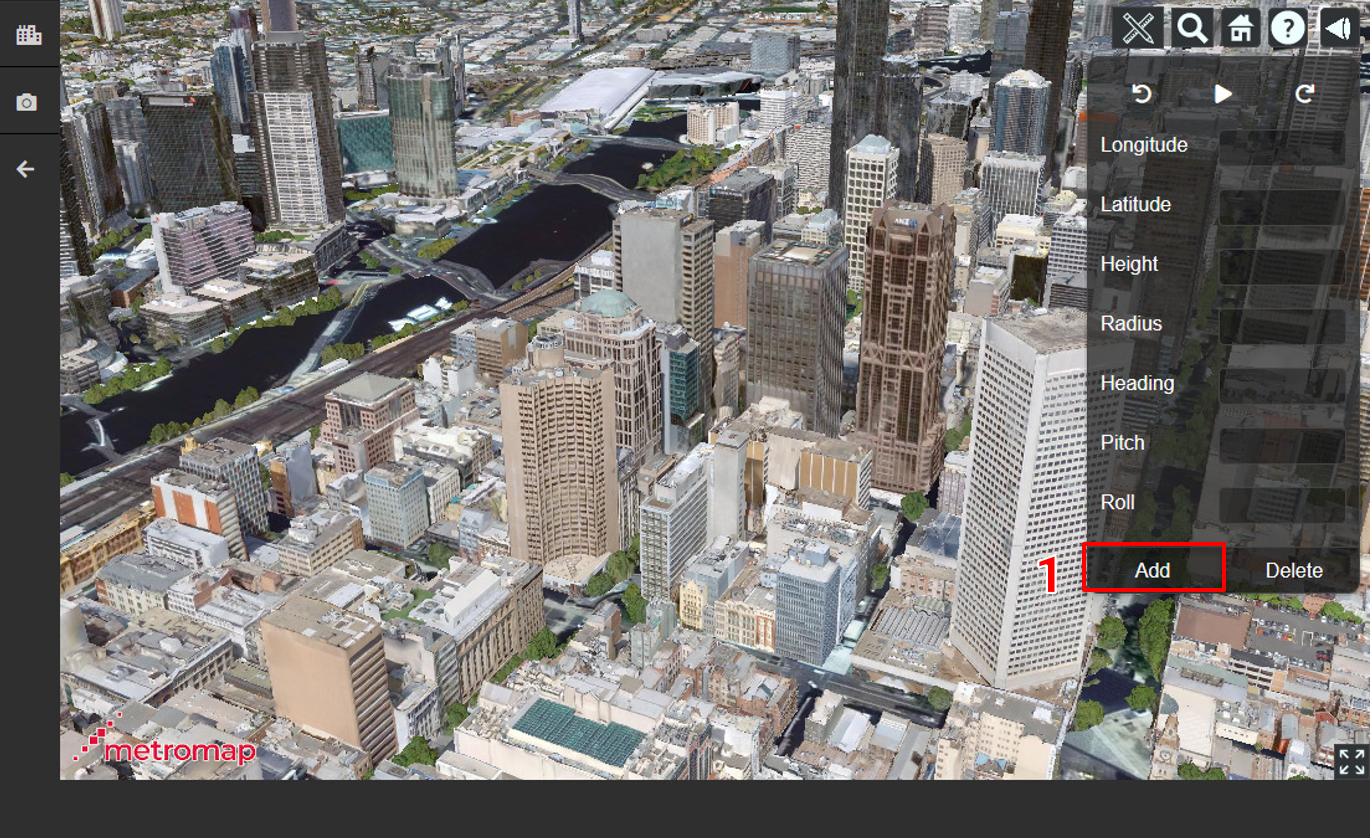
 Viewshed
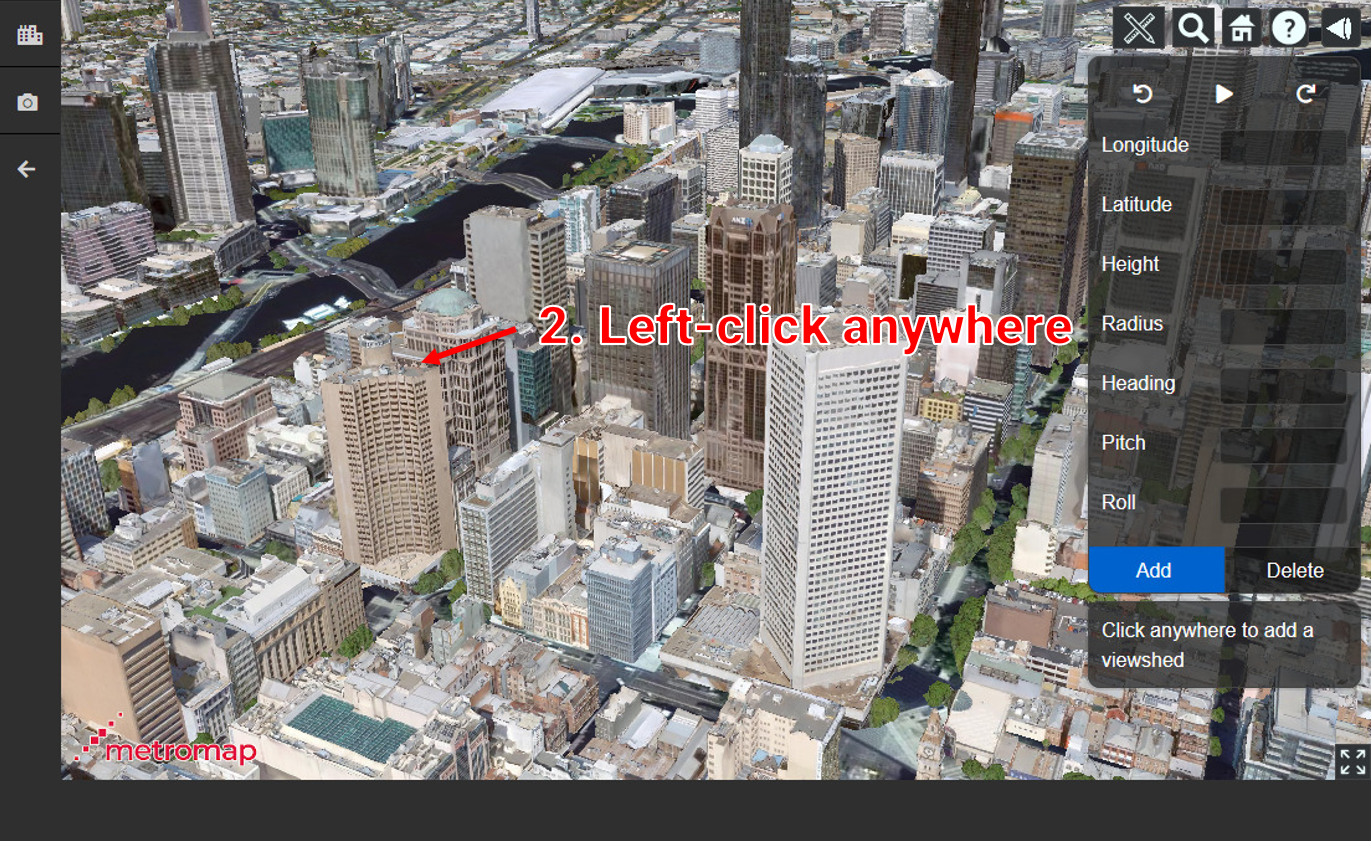
To add a viewshed, open the 3D viewer and click the viewshed button in the toolbar (located in the top-right corner of the interface).

This will open a list of options for the viewshed. To add a viewshed object:
-
Click “Add”
-
Left-click on a location on the 3D tiles.
-
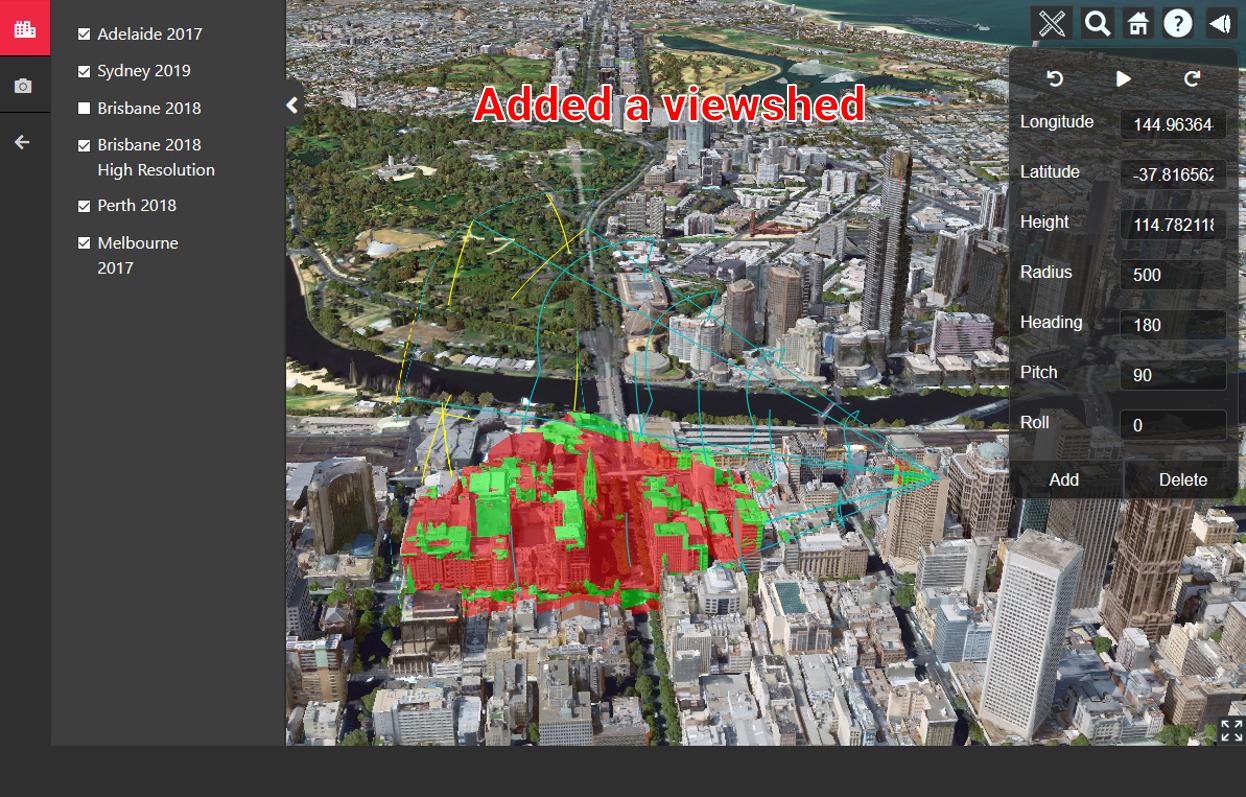
The Options panel will be populated with the coordinates of the viewshed center point (the point you selected by left clicking) and default values for radius, heading, pitch and roll.
You can change the values by typing into the input boxes.
- Height and Radius are in meters.
- Heading, Pitch and Roll are in degrees.
-
Use
 to play/stop the animation. Switch to anti-clockwise by clicking
  and clockwise by clicking
  .
. -
Click the delete button to delete the Viewshed.