AutoCAD Civil 3D
- 03 Nov 2023
- 2 Minutes to read
- Print
- DarkLight
- PDF
AutoCAD Civil 3D
- Updated on 03 Nov 2023
- 2 Minutes to read
- Print
- DarkLight
- PDF
Article Summary
Share feedback
Thanks for sharing your feedback!
These instructions apply to Autodesk® AutoCAD® Civil 3D 2013 and above, and describe how to load georeferenced MetroMap imagery using Web Map Service (WMS).
Please note only AutoCAD Map or Civil 3D are able to connect to WMS providers. WMS connections are not possible in standard AutoCAD or AutoCAD LT.
The tutorial page includes the following sections:
For importing JPG/JGW Files, please refer to AutoCAD Raster Design.
Screen images shown below in these instructions are from AutoCAD Civil 3D 2020.
Setting up a WMS or WMTS Service
Rather than import a single image of a small area, our WMS and WMTS services allow AutoCAD to request the imagery directly from the MetroMap server in a variety of map projections.
Before you start
You will need one of the below URLs as well as an API key which can be provided to you by MetroMap Support:
WMS:
https://api.metromap.com.au/ogc/key/{YOUR_API_KEY}/service?REQUEST=GetCapabilities
WMTS (GDA94):https://api.metromap.com.au/ogc/key/{YOUR_API_KEY}/wmts/1.0.0/WMTSCapabilities.xml
WMTS (GDA2020):https://api.metromap.com.au/ogc/gda2020/key/{YOUR_API_KEY}/wmts/1.0.0/WMTSCapabilities.xml
Setup Steps
Follow these steps to set up AutoCAD Civil 3D WMS or WMTS integration:
Move your cursor into the Drawing area or click the Command ribbon, type in
MAPWSPACE, then press Enter on the keyboard.
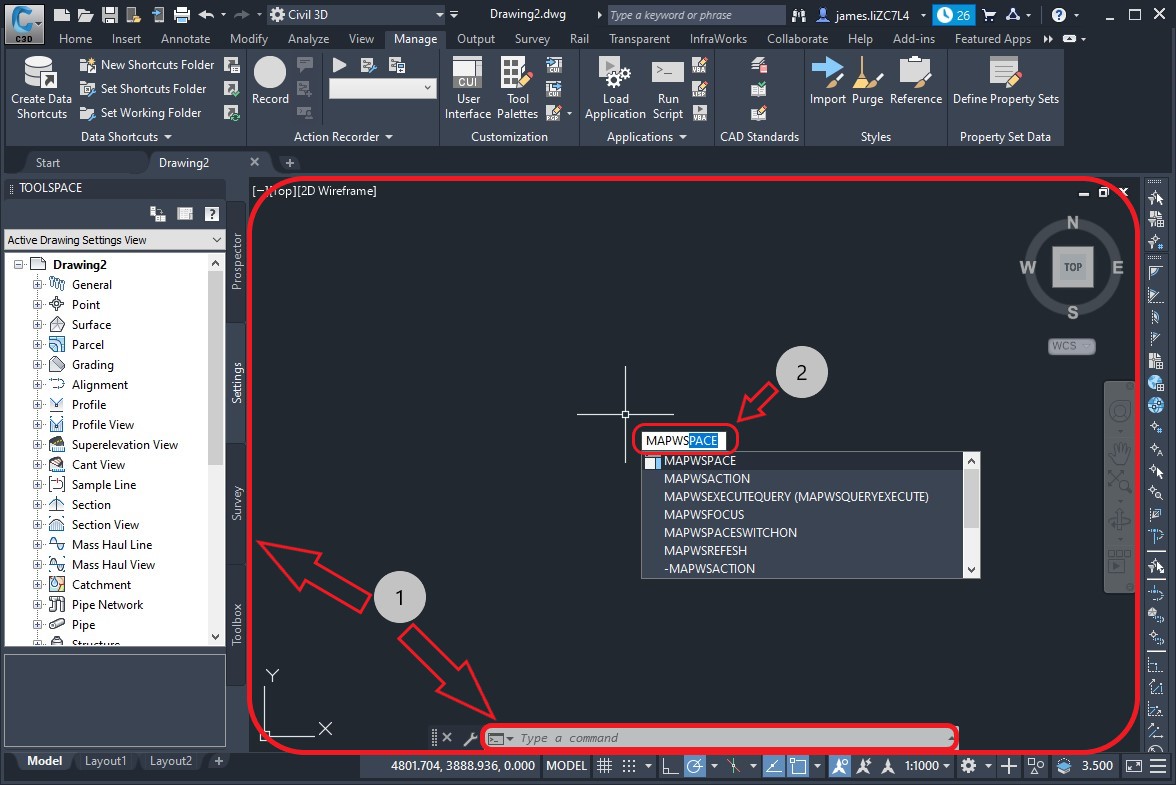
Select On on the follow up menu.

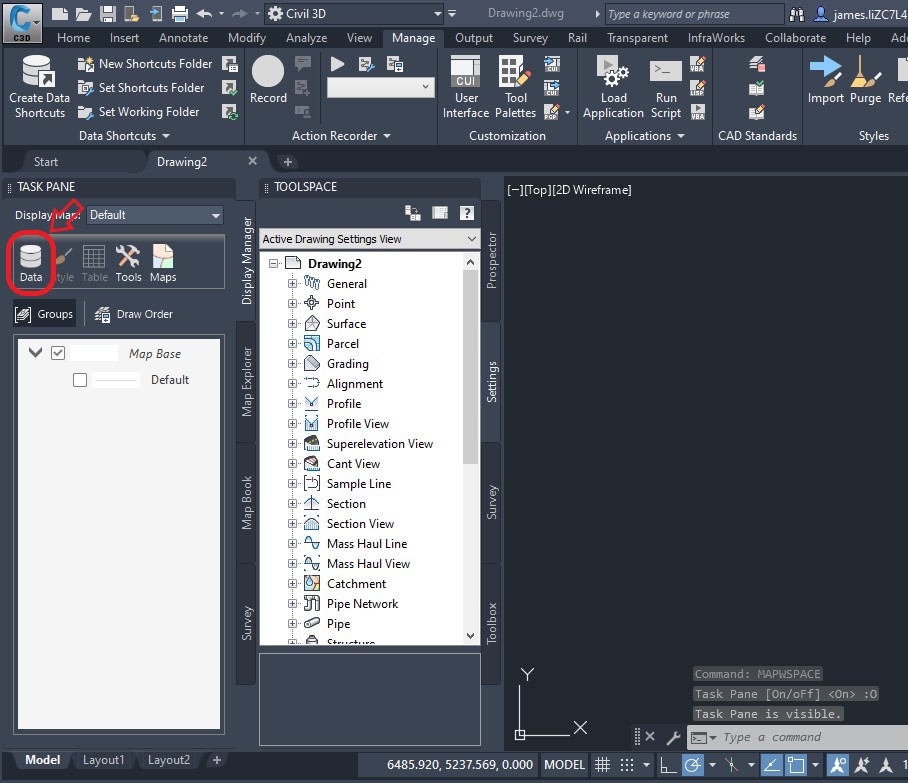
The Display Manager should show up afterwards, click Data button.
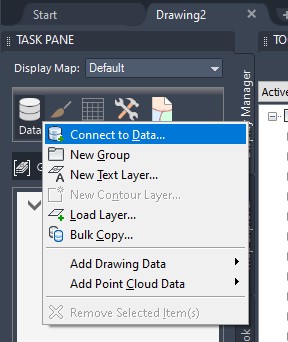
Click Connect to Data...
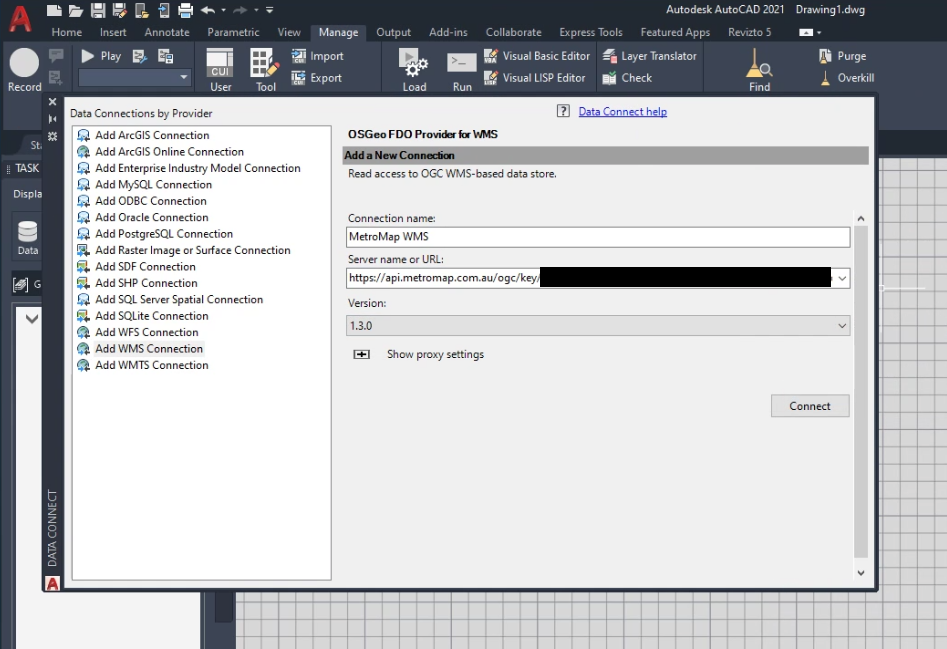
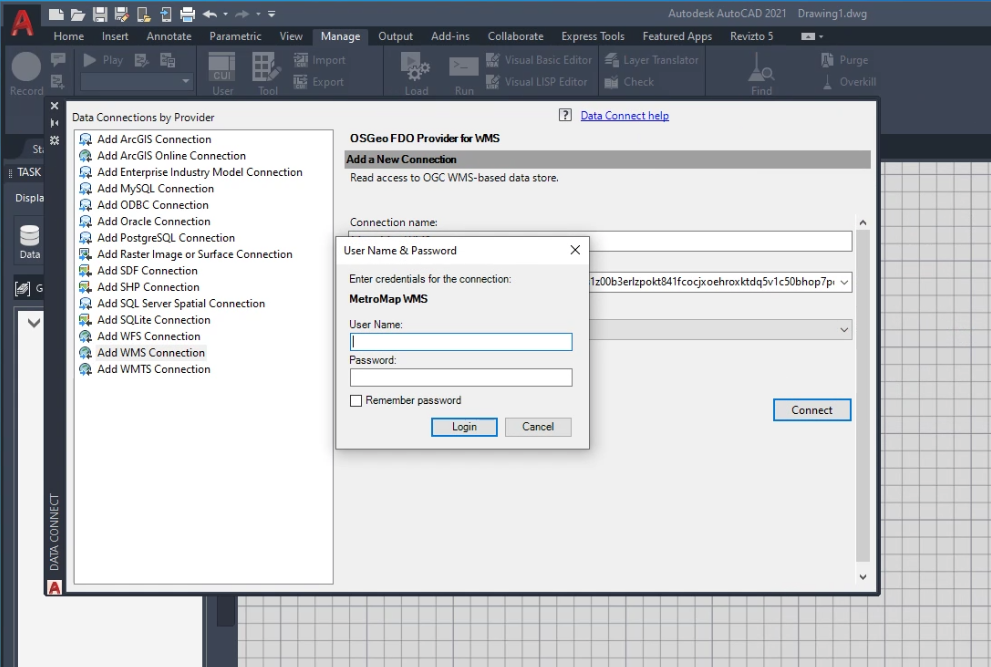
The DATA CONNECT window should show up,
- choose Add WMS Connection or Add WMTS Connection on the left side
- Then enter
MetroMapas Connection name - In the Server name or URL field, enter the MetroMap WMS or WMTS URL (provided at the start of the guide) with your API key inserted to replace '{YOUR_API_KEY}'.
- For WMS, select
1.3.0as Version then select Connect. For WMTS select Connect.
With the Username and Password insert prompt, leave it blank and select login as the API key used in the previous step is the necessary authentication.
Our server provides a variety of imagery layers, choose your preferred one in the list, then click Add to Map.
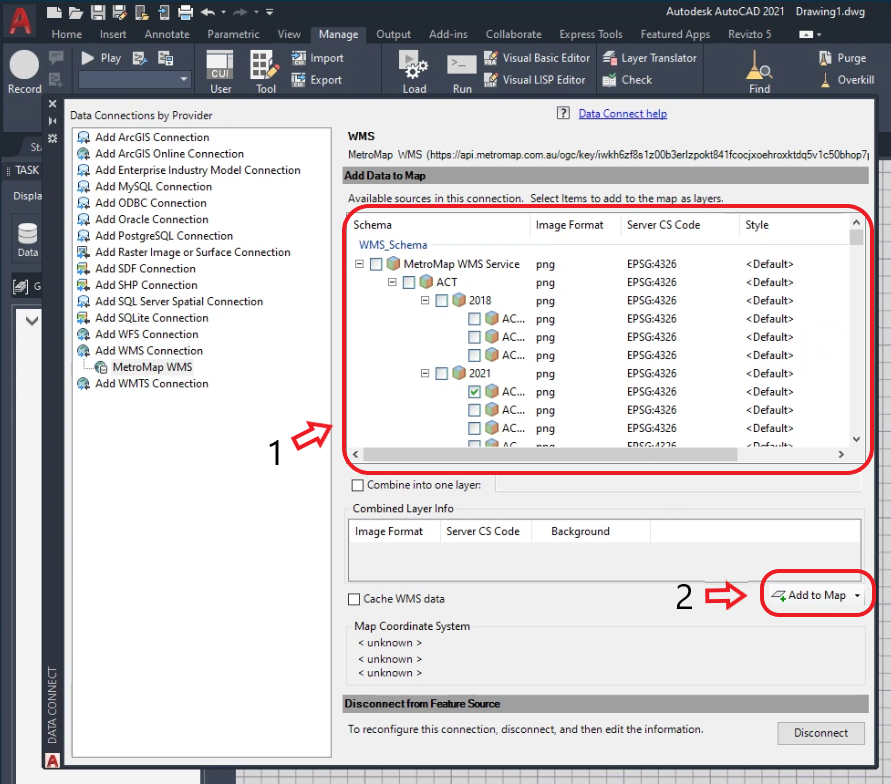
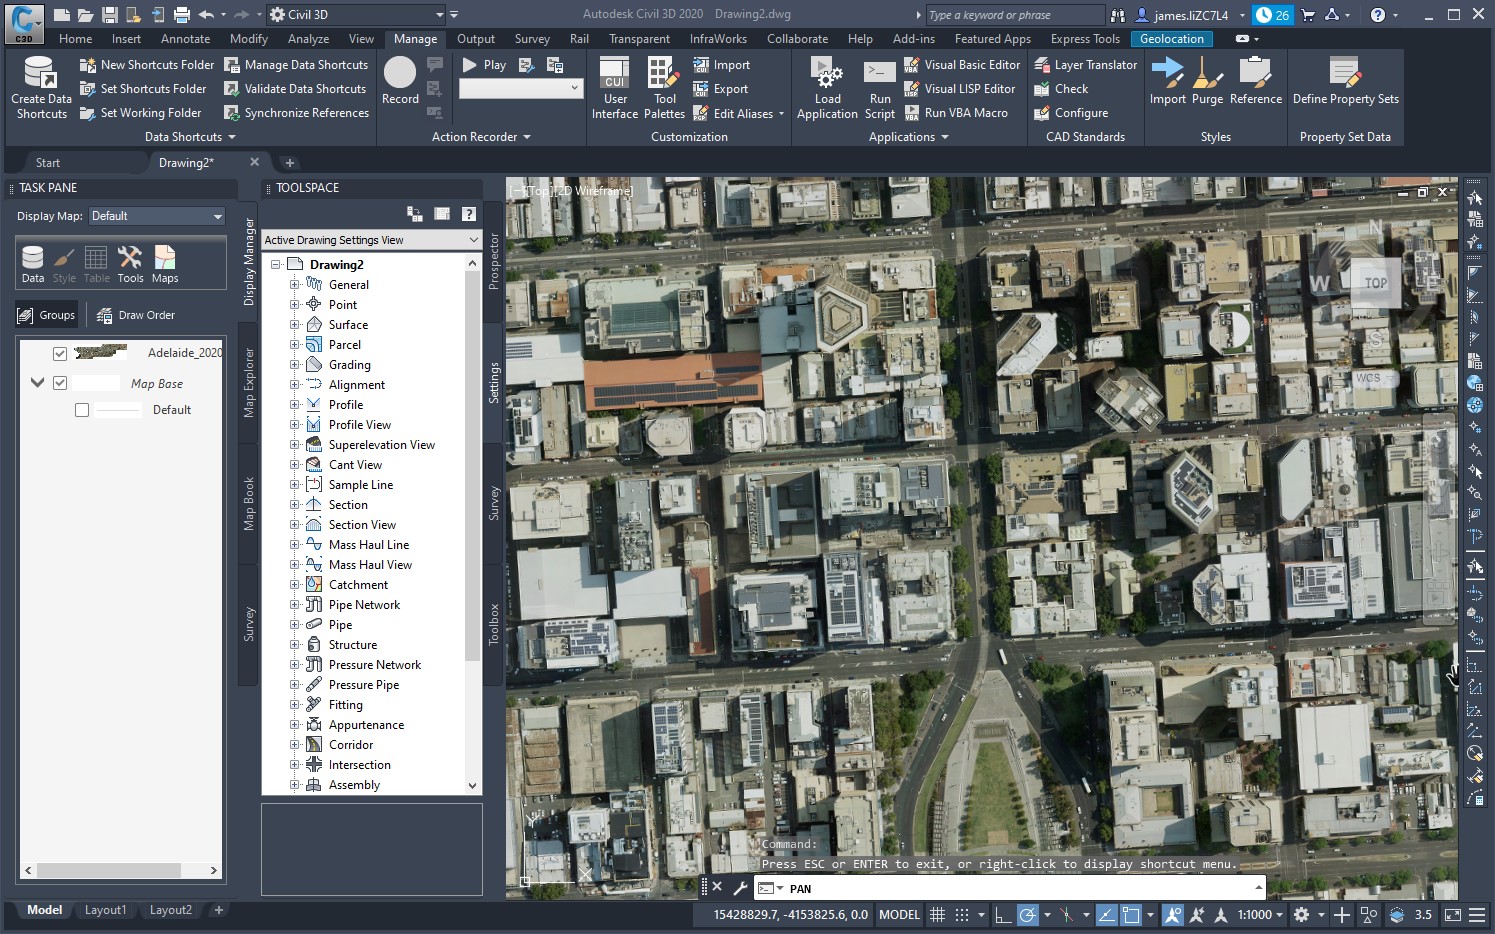
The imagery layer should show up in the Drawing Area. Higher resolution imagery is served on demand as you zoom and pan.


Setting up a Coordinate System
Back in the Command ribbon, type in
MAPCSASSIGN, then press Enter.
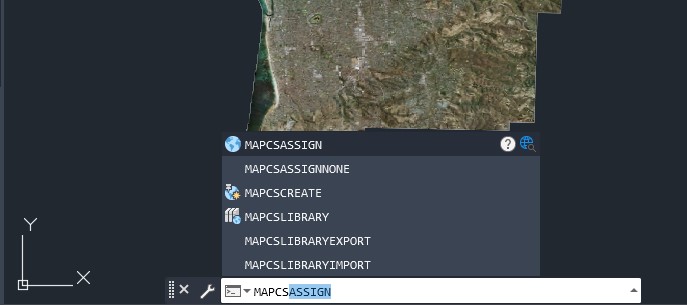
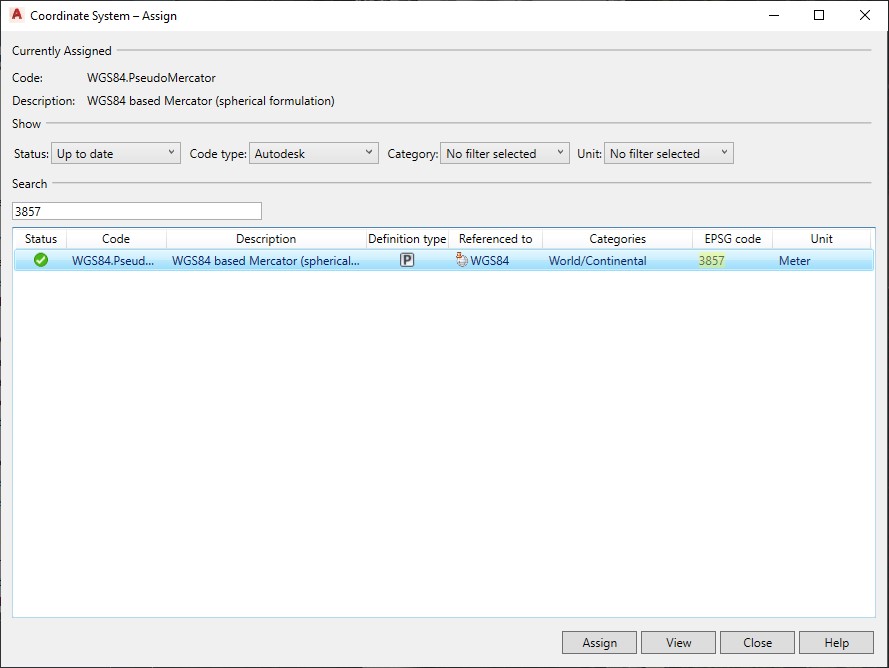
In the Coordinate System - Assign window,
- search your preferred Coordinate System;
WGS 84 / Pseudo-Mercator EPSG:3857was used in this particular example.
Please note that our MetroMap system provide various projection systems.
At the time of this document's creation, MetroMap is able to deliver the following Coordinate Reference Systems:- EPSG:4283
- EPSG:4326
- EPSG:3857
- EPSG:28349
- EPSG:28350
- EPSG:28351
- EPSG:28352
- EPSG:28353
- EPSG:28354
- EPSG:28355
- EPSG:28356
- EPSG:7844
- EPSG:7849
- EPSG:7850
- EPSG:7851
- EPSG:7852
- EPSG:7853
- EPSG:7854
- EPSG:7855
- EPSG:7856
- EPSG:3107
- EPSG:8059
- Then click Assign.
- search your preferred Coordinate System;


Was this article helpful?